LittleJudeonFood

One kid's adventures in gastronomy


2 Comments

Stuff It

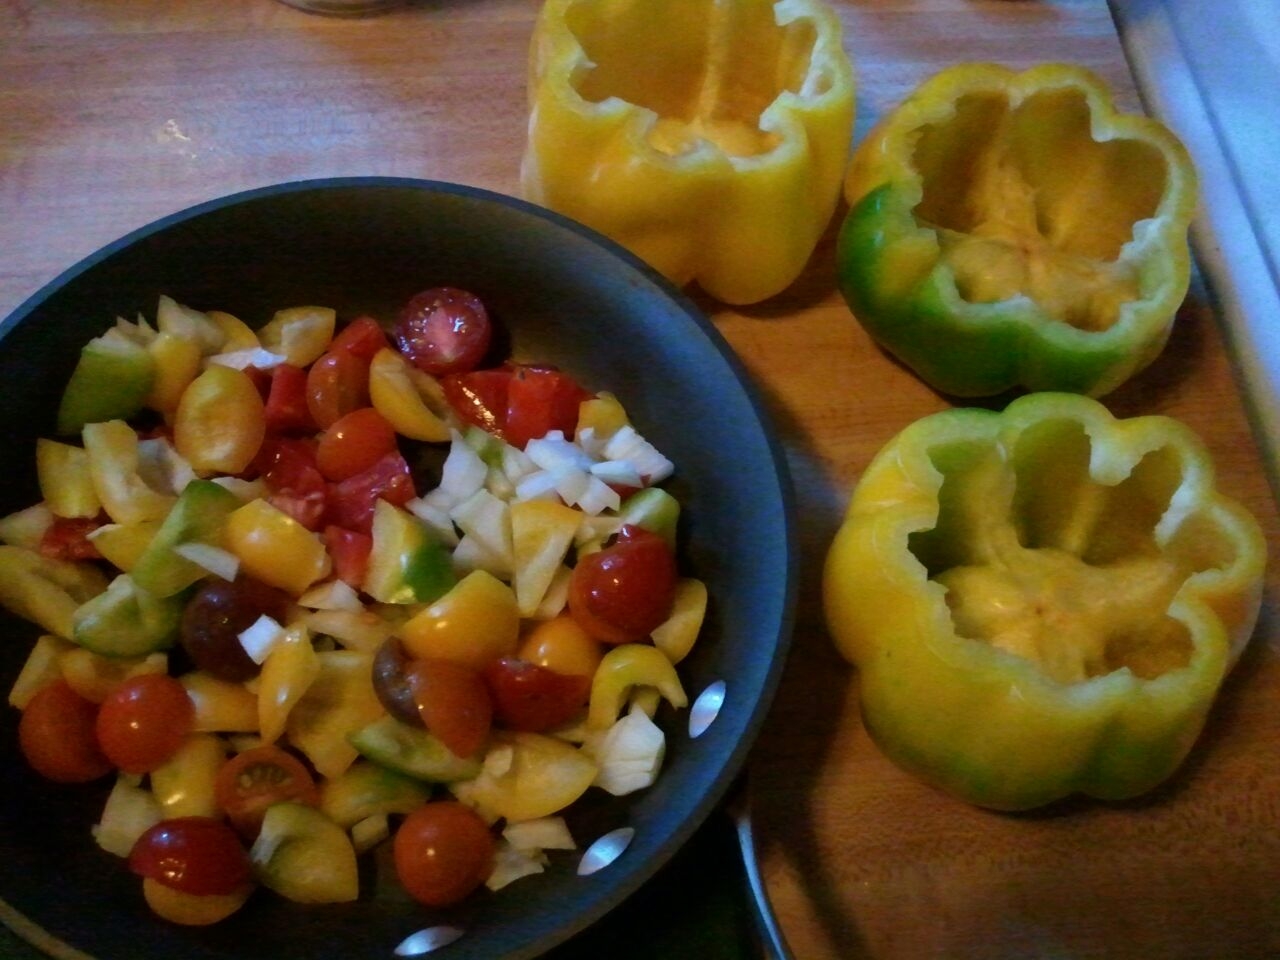
In an effort to fill a Sunday, Mama and I traipsed around to different farm stands (with a stop at the zoo somewhere in between). Next to the zucchini that was almost as big as me, she spied some gorgeous giant yellow peppers and thought they would make good stuffers. At a later stand, she bought a couple ears of sweet corn (this is important, so pay attention).

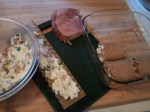
Much like our ham-and-pea roll-ups, these peppers were stuffed with things we already had in the house. Mama says you can cram practically anything into them. She cut around the top of the pepper and pulled out the seedy core. Then she broke off the pieces of the pepper top and chopped it so she could add it to the pepper stuffing mix. We still had some tiny heirloom tomatoes from my friend Walter, and we had an already-cut onion in the fridge. She put these veggies into a small frying pan with olive oil, cumin, coriander, and salt & pepper and sautéed them until the pepper and onion were soft and the tomatoes were cooked down. She added the kernels from an ear of corn and some crumbled veggie meatballs she had made a few weeks ago and had in the freezer.

How can these not be good?

How can these not be good?

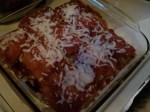
She stuffed a pepper for me, then added to the rest of the stuffing some adobo sauce from a can of chipotle peppers that were also leftover in the freezer. Mama tented foil over the peppers and baked them in a 375°F oven until they softened, 20–30 minutes. She took the foil off towards the end of cooking, to brown the tops of the peppers.

You can see the added corn & broken up "meat"balls added to the filling.

You can see the added corn & broken up “meat”balls added to the filling.

Meanwhile, Mama cooked some brown rice, but she could very well have used quinoa or couscous. You can certainly add this to the pepper stuffing, but she kept it on the side and added it to the peppers before we ate them. She also made a fast guacamole and baked some tortilla chips by breaking up a whole-wheat wrap, spraying the pieces with cooking spray, and putting them in the oven for 10 minutes while the peppers cooked. (You can season these with salt & cumin, but Mama left them plain.)

Though I’m generally a fan of avocados, I wasn’t too keen on the guacamole. I did dip my chips in it (just barely), though. And to everyone’s surprise, I ate more than a few bites of the pepper stuffing. I had to examine each bite first to figure out what was on my fork, and I wasn’t much in the mood to eat (having missed my nap), but eat it I did. Mama and Papa kept asking, “Isn’t it silly that there’s a pepper for a bowl?” I’ll tell you what’s silly: they ate their bowls. Now, isn’t that silly?

Love, Jude

Peppers Stuffed with Summer Goodness

1 teaspoon + 1 tablespoon olive oil
12 ounces extra-lean ground beef, ground pork, or soy crumbles [optional]
4 sturdy bell peppers (any color)
1 onion, finely chopped
1 pint cherry or grape tomatoes, halved
1 teaspoon ground cumin
1 teaspoon ground coriander
1 ear corn, kernels removed (about 3/4 cup)
1 chipotle pepper in adobo sauce, chopped [optional]

Preheat the oven to 375°F.

In a medium skillet over medium heat, heat 1 teaspoon olive oil. Add the beef and cook, stirring occasionally, until just barely cooked through, about 6 minutes. (If using frozen soy crumbles, cook until heated through.)

Meanwhile, carefully cut around the top of each pepper, right below the “shoulder,” then pull out the seedy core. (Save the tops.) Pull out any remaining ribs and seeds. Set cored peppers aside. Break off the pepper tops from the stems, and roughly chop.

To the skillet, add the remaining tablespoon olive oil, if necessary. Add the chopped pepper tops, onion, tomatoes, cumin, coriander, and salt and pepper to taste. Cook, stirring occasionally, until the pepper and onion are soft and the tomatoes have cooked down, about 8 minutes.

Add the corn and the chipotle pepper, if using, with as much adobo sauce as clings to it. Stir to heat through.

Divide the mixture among the peppers, setting them in a baking dish just big enough to hold them, such as a pie plate or 8 x 8” pan. Loosely tent the peppers with aluminum foil, then bake for 20 minutes. Remove the foil, then bake another 10 minutes, or until the peppers are softened and the tops are browned.


1 Comment

Pantry Raid!

So, Papa suggested pizza for dinner, to which Mama replied, “Get a different kind from the one we had for lunch?” Clearly, they were both feeling uninspired. But dinner time was creeping up on us, and neither one of my parents felt like heading off to the store after the busy day we’d already had. Mama decided to embark on a mission.

After rooting through the freezer, she pulled out a bag of sliced, cooked ham. (A couple months back, hams were on sale—never mind that it’s really only papa in the house who eats the stuff—and it was into the freezer with the leftovers.) While that was thawing under warm water, Mama pawed through the fridge and found a nearly full container of ricotta cheese. She bought it to fill yellow squash “boats” that she grilled earlier in the week. The wheels started turning. She rummaged through the cupboard and found an opened box of whole-wheat lasagna noodles. Bingo!

Into a pot of water went 9 noodles. Into a bowl went the ricotta, some grated parmesan cheese, a bunch of parsley from the garden, chopped up, salt & pepper, and a few slices of that ham cut up. For good measure, Mama even returned to the freezer to finish off a bag of peas. Once the filling was mixed and the noodles drained, Mama laid out a noodle, spread some filling down it nearly to the end, then rolled it up. Practically in the time it took to preheat the oven (to 350°F), she had these rolls done and laid seam-side down into a lightly oiled baking pan. She covered them with a thin coating of jarred marinara that had been lurking in the back of the fridge and baked it, covered in foil, until it was heated through (about 20 minutes). Then she topped it with a sprinkling of mozzarella (also remnants), returned it to the oven for another 5 minutes, and dinner was ready.

The only thing Mama would’ve done differently was spread a bit of the sauce in the pan first, before laying down the noodle bundles. Not that I minded either way. I ate almost an entire roll all by myself. And that’s what Mama calls a successful dinner. Pantry raid, indeed.

Love, Jude


2 Comments

“Crunchy granola” is a good thing!

I helped Mama make granola the other day. We like to eat it with yogurt, but it’s also pretty good on its own. And it’s so simple to make! The beauty of granola, as Mama explained it, is that you can add whatever you like to it.

Your base is going to be rolled oats, of course, but you can add any nut, seed, or grain that suits your fancy. I helped add sliced almonds and some wheat germ. Then you need something to bind it all together–remember, a little goes a long way–plus, a bit of oil to keep it from sticking to your pan (and to help it toast). We used honey and maple syrup, but you don’t even need both. And we added some flavorings like vanilla and almond extracts and cinnamon & cloves.

You spread it out in a single layer on 1 or 2 baking sheets, then bake for 25–35 minutes in a low oven (275–325°F), stirring once during cook-time and rotating the sheets, if you have more than one. When you stir it, it’s a good time to add any other dried ingredients, like raisins, cranberries, dried apricots, or shredded coconut. You could add it when you first mix your batch of granola, but you risk these add-ons burning or turning too hard. Or so says Mama. Cool the granola completely before putting it in an airtight container, otherwise it’ll get soggy. And nobody likes soggy granola.

Image

Ideas for granola add-ins:

  • sunflower seeds, sesame seeds, flax seeds, pumpkin seeds
  • walnuts, pecans, hazelnuts, almonds, macadamia nuts, pistachios
  • white chocolate chips, dark chocolate chips, butterscotch chips, peanut butter chips, Heath toffee bits, M&Ms
  • dried apples, pears, cherries, cranberries, apricots, mango, pineapple, currants, figs, blueberries, golden raisins, prunes, crystalized ginger
  • crispy rice cereal, shredded coconut, chopped pretzels, wheat germ
  • maple syrup (the really good kind), agave nectar, brown sugar (in oil or melted butter), canola oil, coconut oil, peanut butter, cashew butter, almond butter
  • vanilla, almond, orange extracts
  • spices such as cinnamon, cardamom, nutmeg, cloves, allspice–or try something altogether different, like curry

Love, Jude


5 Comments

Any time is pie time

Well, we went and picked more blueberries. Mama, drawn by an end-of-season panic that our freezer wouldn’t be stocked with as much summer goodness as possible, decided we needed another go at the bushes.

Later, as the berries soaked to remove the grass clippings and errant bugs, I reached in and grabbed handfuls, gobbling them like Cookie Monster. Mama said she was not amused, but I wasn’t buying it.

So while I slept, Mama felt like making a tart. She happened to have leftover dough in the freezer from the tomato pie, so she just used that. And she swapped a cup of the blueberries for a cup of pitted sour cherries, and omitted the lemon juice in favor of the cherry juice.

With just 2 tablespoons of sugar in the WHOLE tart, Mama didn’t feel too guilty about letting me have a piece after breakfast. And I didn’t feel guilty eating it.

After I ate a pretty good breakfast, Mama decided I could try a piece of the tart (as she was having a piece for breakfast herself). She showed me how pretty the bluebies looked, and I was ready to start picking them off. While I was disappointed that I couldn’t stuff them in my mouth, Cookie Monster–style, I liked eating them with my fork. The cherries were still a bit plump, too, and all the fruit was pleasantly tart. The pastry was still flaky and soft.

Maybe I can have pie for lunch too?

Love, Jude


3 Comments

How do YOU pad thai?

Papa announced that he had a hankering for pad thai. Now, normally he and Mama would just order in Chinese, but for some reason, they decided to make it themselves.

If there were a signature dish to Thailand, this would be it. There are oodles of variations on it, but your basic components include rice noodles, tofu and/or shrimp, cooked egg, fish sauce, chilies, garlic, bean sprouts, cilantro, lime, and crushed peanuts—all done in the same wok. Often there’s carrot, scallion, basil, and tamarind in some form, as well.

Mama said I could be in charge of the noodles, but as they required being steeped in boiling water, she thought better of it, so off I went to play with my trains. Papa was in charge of chopping, while Mama made the sauce and got everything ready to go. When you stir-fry, you’re cooking over very high heat, so it goes quickly. If you start cooking, then stop to chop your garlic or mince your chilies, what’s in the wok will probably already be burned before you’re done. So get your mise en place together.

The first step is to cook your egg, as a kind of tiny, very flat omelet. First you lightly beat your egg, then when it hits the hot oil in the pan, you continue to beat it for about a minute before it starts to set. Once it’s cooked, remove it from the pan, slice it into thin strips, then add more oil to the wok. From there, you start to quickly cook your protein (cut into small pieces if it’s not tofu or shrimp); then remove it from the pan and then add your veggies. Follow with your sauce and your noodles, mixing it all up. Add back the egg and protein, and keep mixing everything. You want your noodles to absorb the yummy sauce and begin to fry a little bit. Then top with crushed peanuts and raw sprouts. Serve with wedges of lime.

You don’t have to use a wok, but the deep sides of the pan sure help to keep all the noodly goodness in one place.

Mama had the back of her mind on alternate dinners for me, so sure she was that I wouldn’t eat the pad thai. But since she opted to go without the chilies, there was nothing about this I didn’t like. Those springy noodles were great, and I really liked the egg! The crunch of peanut was nice, too. But you know… I felt it needed more lime. So I said so. “I need lime.” And the reward for my fledgling sentence was more lime. Mama also served a cucumber-soy-ginger salad on the side. I had one salty bite, but I preferred the pad thai. What can I say? I’m a simple guy.

Next to tastiness, these noodles were just plain fun to eat.

Love, Jude


1 Comment

A little balsamic reduction makes everything taste better

I’m a quarter Italian, just under half Irish/U.K., and just a little over a quarter Eastern European mixed breeding. That’s a lot of heritage for this young lad to shoulder. But just think of all the wonderful foods I get to eat as a result. Take, for example, pierogies.Mama says my Great-Baba made the best pierogies. When she was growing up, Mama would visit her for two weeks every summer, and they were the first meal she’d eat when she arrived. She and her parents and brother and sister would swarm like locusts around the kitchen table, devouring little dough pillows of mashed potatoes with cheddar, caramelized onions, sauerkraut, stewed prunes, or thick and chunky applesauce. They even had a funny name for them, something that sounded a lot like pudaheya. There was—and still is—much discussion as to the best way to prepare pierogies: boiled, then pan-fried leftovers the next day. And always, always served with buttermilk, sour cream, fried onions, and home-canned wild mushrooms that Great-Baba and her sisters foraged in the woods.

But this post isn’t about pierogies. Not really. You see, Mama knows how to make them, and she plans on showing me sometime this fall (stay tuned—maybe my Auntie Karen will chime in!), but since I’m such a handful, she hasn’t really had the opportunity to make them. So sometimes she takes advantage of those that are already made. And come in a box. In the freezer section.

The horror!

So what to do? How do you dress up what’s essentially pub fare? First, you caramelize some onions. We happened to have some lovely purple beauties from my friend Walter’s farm. They’re very easy to do—slow cook thinly sliced onions in butter and olive oil (or either/or) with a pinch of salt until they’re melted and browned. But if you really want to class ’em up, you whip out the balsamic reduction.

In the time it takes to fry the pierogies (Mama skips the boiling stage these days), you can make a tangy, viscous, shimmering bit of deliciousness that you can put on just about anything. Mama likes to have it on-hand, but as we were out, she wanted to make a very fast batch. She poured about half a cup of balsamic vinegar into a small saucepan and cranked the heat until it started bubbling. Then she lowered it to medium, threw in a large pinch of brown sugar (honey would work too), and let it simmer until it reduced…and reduced…and reduced. When it’s ready, it shouldn’t be as thick as chocolate syrup, but it should be rich, like good maple syrup. And it should coat your spoon like a silk shirt.

Just try convincing yourself that you don’t want to eat this.

When combined, the sweet and buttery onions meld with the slightly sweet and oh-so-tart balsamic reduction over the crisp pieorgies—whatever their provenance. Mama didn’t think I would like the reduction (since I’ve never been very keen on the vinegar), so she served me a naked pierogi with a few onions. Absurd! But Papa… now there’s a man who knows what it’s like to be fed well. He gave me big bites of his black gold–speckled potato puffs. And now I can look forward to when we can serve it over our own homemade pierogies, and do Great-Baba proud.

Love, Jude


11 Comments

It’s all about the bluebies

The other day, Mama took me blueberry picking. By now you realize that she keeps a pretty close eye on what I eat, and I think you know she tries to purchase foods that are local and organic—when they make sense. Blueberries are consistently among the Environmental Working Group’s “dirty dozen” of fruits and veggies with the most pesticides, but because Mama doesn’t always want to pay $6 for a pint of organic berries, we often skip them. For this reason, she was overjoyed to find the organic fruit farm just a short drive from our house. And it turned out to be a fun afternoon activity with yours truly.

I enjoyed picking the bluebies…

I couldn’t believe how little the bushes were! I walked right up to them, bucket in hand, and just started picking (and eating). It was like when we picked the wild raspberries: from the bush and into my mouth.

…almost as much as I enjoyed eating them.

The berries were warm from the sun. Mama reminded me, often, to pick just the blue ones—not the purple ones, and not the green ones. We saw all kinds of big caterpillars on the leaves. The farmer, when he came over to snack from a bush, told us they sure love blueberries. Much like Sal in that famed story, I did wander off from time to time, and Mama had to chase me up and down the rows. But we managed to fill her bucket (for some reason, mine remained empty), and I played with the two farm dogs roaming the property. We picked nearly 5 pounds (but they didn’t weigh me!), all for $12.

Er, this is my bucket. That’s Mama’s in the background.

When we got home, Mama spent a lot of time washing the berries and fending me off from eating them by the handfuls. They had a lot of grass clippings—and bugs!—on them. I helped her de-stem them, too. (That’s a very good task to give someone my age…until said someone starts snacking on them, stems and all.) Because most of our haul was intended for the freezer, Mama spread the berries on a towel-lined cookie sheet so they could dry. (This is why you can buy frozen berries that are separate and perfect, rather than in clumps—they’re individually quick frozen.) You spread them out on a sheet, make sure they’re relatively dry, then pop the sheet in the freezer. Once frozen, you can put them in storage bags or containers. We got 3 sheets of bluebies.

This is how you dry the washed bluebies before freezing them.

As they were drying, Mama asked what we should make, and I agreed that muffins sounded good. I’ve never made a recipe quite like this one before. Mama melted the butter in a saucepan and added the other wet ingredients to it before adding them to the dry. Weird, huh? Usually, you’d use oil in a two-stage recipe, she told me, but we like butter! It’s been a while since I’ve baked anything, and Mama was impressed with how far I’ve come. I poured all the dry ingredients into the bowl without spilling—the mess came later when I whisked it like a dervish.

You can’t see it here, but my belly is COVERED in flour!

Once everything was combined, I added the bluebies to the batter, then helped Mama fold them in. She explained that if we stirred them too vigorously, they would crush and stain the batter blue. Not that it would affect the taste any, but we wouldn’t have those lovely whole berries to sink our teeth into later on.

This was my last chance to eat bluebies before they were mixed in.

She showed me how quickly you can make a crumb topping, and I helped sprinkle it on top of each muffin. Into the oven they went, and off I went to play. I was experiencing some sort of natural berry high and had a lot of energy.

Check me out!

But not too much to keep Mama from giving me half a muffin once it cooled a bit. (She thinks I didn’t notice she ate the other half.)

YOU try eating just half of one.

Regardless, there were so many bluebies in it! The muffin itself wasn’t very sweet, but the bluebies made up for that. And they were good and crumbly in my hand.

After a long day of picking the bluebies and washing the bluebies and making the bluebie muffins, I finally get to eat one!

Mama said she wants to go picking again next weekend to stock up for the winter. I hope we do!

Love, Jude

Bursting Bluebie Muffins with Crumb Topping

6 Tbsp unsalted butter (or canola oil, then skip the saucepan direction)
1/3 cup buttermilk (or milk)
2 eggs (or 4–5 Tbsp unsweetened applesauce)
1 tsp vanilla extract
1 cup whole-wheat flour
1/2 cup all-purpose flour (or 1 1/2 cups all-purpose total)
1/2 cup sugar (or brown)
1 1/2 tsp baking powder
3/4 tsp salt
1 1/2 cup blueberries

For topping:

handful of whole-wheat flour
spoonful of brown sugar
spoonful of finely chopped walnuts (optional)
a few pats of butter

Preheat the oven to 375°F. Butter or spray 12 muffin cups (or use paper liners, if that’s your thing). Melt the butter over low heat, then whisk in the milk, eggs, and vanilla. In a separate bowl, combine the dry ingredients (minus the blueberries), whisking to incorporate. Add the wet to the dry, stir until just combined, then gently fold in the blueberries. Top with the topping ingredients, mashed to combine. Bake for 17-20 minutes, until a wooden pick inserted in the center of one muffin comes out clean. Cool in the pan for 5 minutes, then, if you didn’t use papers, run a knife around the edges to loosen. Transfer to a rack to cool or eat!


3 Comments

Can you spot the pun?

I used to eat beets. A lot. Mostly they were pureed, sometimes mixed with apples and carrots. I’d make a real mess out of them, that’s for sure! But when we got some beets from my friend Walter’s farm, Mama decided to try something that the whole family could enjoy. Yet, she wanted something fast, and if you know anything about beets, you know that they take time to prepare. There’s boiling them until soft, and there’s roasting them until soft. So what to do?

Grate ’em! If given her druthers, Mama would rather use a mandoline than a box grater any day, and it was probably because of this attitude that she knicked her thumb knuckle on it. So let me warn you now: be careful! Anyway, grating the beets (after peeling them) turned them into small enough pieces that could be cooked in a skillet…to which she added butter, the grated beets, the zest and juice of 1 lime, then some salt and pepper. Aside from the afore-mentioned grated knuckle, it was an easy dish to fix and tasted quite yummy. The tart lime contrasted with the sweet beets, and the slight creaminess of the butter played off the tiny bit of saltiness. And we all had pink pee!

Mama paired these beets with organic, whole-wheat farfalle pasta (that’s the kind shaped like bow-ties, but if you really want to know why they’re called farfalle, it’s because that’s the Italian word for “butterflies”), dressed in the leftover kale pesto that she brought back to life with a bit of the pasta cooking liquid. Papa grilled a simple salt-and-pepper pork chop to share with me, and dinner was done!

I wish I could say I ate more than my requisite one bite of pasta and chop…but I was feeling pretty beet after the long day I’d had picking blueberries and making muffins (stay tuned).

Love, Jude


3 Comments

It’s an Acquired Taste

Not everyone enjoys curry, but I do. Mama cooks her version of Indian food, and she and Papa once took me out for Indian. But I’ve found I really like it in a soup. Mama made a soup that she packed up for the freezer, and it never even made it there. Just look at me devouring it:

I pulled my chair over to the counter and dived right in. The soup wasn’t even warm, but I couldn’t stop eating it.

Mama tells me that even though curry comes in a spice jar, it isn’t actually a spice that grows as curry. It’s a blend of different ingredients, and people all over India and other parts of Asia have their own way of making it, as it is passed down from generation to generation. Some blends are hot, some are sweet. Some are orange, some are yellow, and some are green. Sometimes the whole spices (such as coriander and cumin) are toasted in a dry pan to enhance their flavor before they are ground into a powder.

We don’t make our own curry, but we could. And maybe we will! What I like about the idea of making a curry powder, is that we can’t really go wrong. We’ll add a little of this and a lot of that until we like the taste we’ve developed. Here are some individual spices that could go into a curry:

  • Coriander
  • Cumin
  • Turmeric
  • Pepper
  • Salt
  • Mustard
  • Garlic
  • Fenugreek
  • Fennel seed
  • Cardamom
  • Cinnamon
  • Cloves
  • Red chili
  • Poppy seeds

Alas, I cannot give you the soup recipe, but Mama said that in addition to curry, it had turmeric and some cayenne, along with red lentils (because they cook quicker), onion, carrots, fresh lime juice, and cilantro. She cooked them in a pot, and once the lentils and vegetables were soft, she pureed it. The soup was creamy a flavorful, but not overly pungent. And I really liked the color.

I ate this soup for dinner and again for lunch the next day (out of a bowl, sitting at the table). And you know I’m not a big fan of leftovers. If anyone makes their own curry, please feel free to post your recipe here, as I’d sure like to try it.

Love, Jude


3 Comments

I’ve been promoted…

…to “Kale Chip.” You might recall that last summer my cousins began calling me “Kale Puff,” in reference to my snack of choice (in lieu of sugary, o-shaped, or fake-cheese snacks). While I’ve been a bit turned off to green foods of late, I feel the need to come clean on something. This morning, I climbed up onto the counter (I have been getting taller and stronger!), took down the container of freshly made kale chips, and proceeded to eat them. For breakfast. Go past “moo-moo milk” and yogurt, and head directly to greens.

I’m holding a chip in one hand, eating one with the other, and getting ready to feed my fleet of trucks.

I can’t explain it. Perhaps it’s their slight crunch. Perhaps it’s their saltiness (Mama can be a bit heavy handed with the stuff). Perhaps it’s because I can munch and munch until I stuff a pretty big leaf in my mouth. Perhaps it’s because these chips were made with kale from my friend Walter’s organic farm. (In fact, he helps his mama harvest the kale; she tells us it just keeps growing and growing.) Or maybe I just really like kale. There are worse things for a kid to like, you know.

Love, Jude

Supereasy Kale Chips

1 bunch of kale, torn from the ribs into manageable pieces
Olive oil spray (not the kind that comes in an aerosol can)
Sea or kosher salt

There are tons of places you can look to find a recipe that suits you, but this just happens to be how Mama made the chips last night. Preheat your oven to 300°F. Lay a sheet of foil, if desired, onto a baking sheet and spread out the torn kale. It’s okay if the pieces overlap—they’ll still dry out. Spray the leaves with the olive oil, then sprinkle liberally with the salt. Bake, checking on them periodically, until crispy, about 10–15 minutes. Store in an airtight container at room temperature until gone.

Note: Mama said to tear your kale into uniform pieces, as bigger pieces won’t dry out as much as smaller pieces. I should also point out that I didn’t like the pieces with even the small veins in them—I kept chewing and chewing, and eventually I had to spit out a little kale blob. If that sounds gross to you, think of how Mama felt when I put it in her hand!