LittleJudeonFood

One kid's adventures in gastronomy


4 Comments

Lavender’s Not Just for Bath Soap

It’s for cooking, too. Mama helped me make a new kind of scone today, using dried lavender flowers. As in other recipes, we first mixed the dry ingredients. I poured flour and sugar in the big bowl and then dug my hands in there. I felt the difference between how the silky, powdery flour coated my fingers and how the grainy, shimmery sugar slid through them. Mama added the other dry ingredients, and I tried to pick out the lavender flowers. (We got them from my friend Milo’s mama, who ordered them online, but you can get them at stores if you know where to look.) She let me whisk all of it together, but sometimes I used my hands to stir it up.

Sometimes it's helpful to put the measuring cup into whatever it is you're mixing.

Then Mama thought it might be better if she mixed the wet ingredients. Because we didn’t have buttermilk, she showed me how to make “sour milk.” She first zested the lemon, since we needed it, then squeezed one-half of it into the cup of milk. That’s it! Then she showed me how to easily dice a stick of butter by using a bench scraper (a knife would work too). Then she gave me the butter cubes to put into the bowl, and I had to taste each one to be sure they were wholesome enough to go into these scones. (Mama tried getting a picture of me licking the butter wrapper, but I was too quick for her!)

After all the butter was in the dough—another new word I can say!—Mama showed me how to work the pastry cutter, a funny looking tool that has a handle. It was a lot of work, so I let her do most of it. (She told me scones can be done in the big mixer, then you don’t have to work as hard.) Then we played with the dough, smooshing the flour into the butter. Mama then poured in the sour milk and let me stir it all.

This is called "cutting in" butter, but I liked it better when we just squished the butter with our fingers.

Then she took a handful of flour and threw it on the counter! It was wonderful. I spread it all over, and then some. Mama turned the bowl over, pulling the broken dough out onto the flour. She and I then squished and patted and pounded it until it formed one solid mass. Then we patted it some more.

Smack it! Next to eating the butter, this was probably my favorite part.

Mama said we really shouldn’t be handling the dough so much because it’s the cold butter that makes scones rise and get all flaky, but we were having fun. (And buttery dough is quite tasty.) She cut the scones with the bench scraper (being careful not to get my fingers as I kept sampling the dough) and put them on baking sheets—not too close together, she warned, because they’re going to spread. She showed me how to brush the tops of the scones with more milk before dusting them with a little bit of sugar.

The dough was so tasty, I couldn't wait for the scones to be baked.

Into the oven they went. After 7 minutes, she rotated the trays so the one on top was now on the bottom, and she turned them around too, so the backs were now in the front. But silly Mama forgot a basic rule of cooking and baking, which is to trust all your senses. She was so busy making lemon curd (which she decided to do at the last minute since she had an extra lemon), that she didn’t keep an eye (or a nose) on the scones as they baked. When the timer went again after 7 more minutes, she took one look at the scones and knew they were overdone. Not inedible-overdone, just not the perfect level of golden she prefers. All that mattered to me was that I couldn’t wait to eat them. She placed a frittata in front of me for breakfast, but all I could think of were those scones sitting on the counter, cooling. They were right there!

Finally, the moment arrived. I took a sample nibble, and yes, they were good. But I’ve had enough scones in my 20 months to know that these were a wee bit overbaked. They should be fluffier in the center and less crispy on the outside. Still, I enjoyed dipping them in the lemon curd. They work just fine for that. Mama thought the scones were on the salty side, so she’d cut back to ¾ teaspoon, if not ½, next time. And the lavender flavor was very subtle—she thinks the dough could tolerate up to another ½ teaspoon. (But that didn’t stop her from eating a second one later in the day.) So even though these didn’t turn out perfectly, I still rate them a “Hit” because we had fun making them, and I could taste their potential. And I got to think about them again when I took my bath later in the morning.

Love, Jude

Lemon Curd
(this is just a tiny batch)

¼ cup freshly squeezed lemon juice (if you get a good lemon and juice it really well, 1 should be enough)
small splash of vanilla extract
1 egg
bit of sugar (less than ¼ cup, but really, you can make it as sweet as you like)
6 tablespoons room temperature butter, cubed

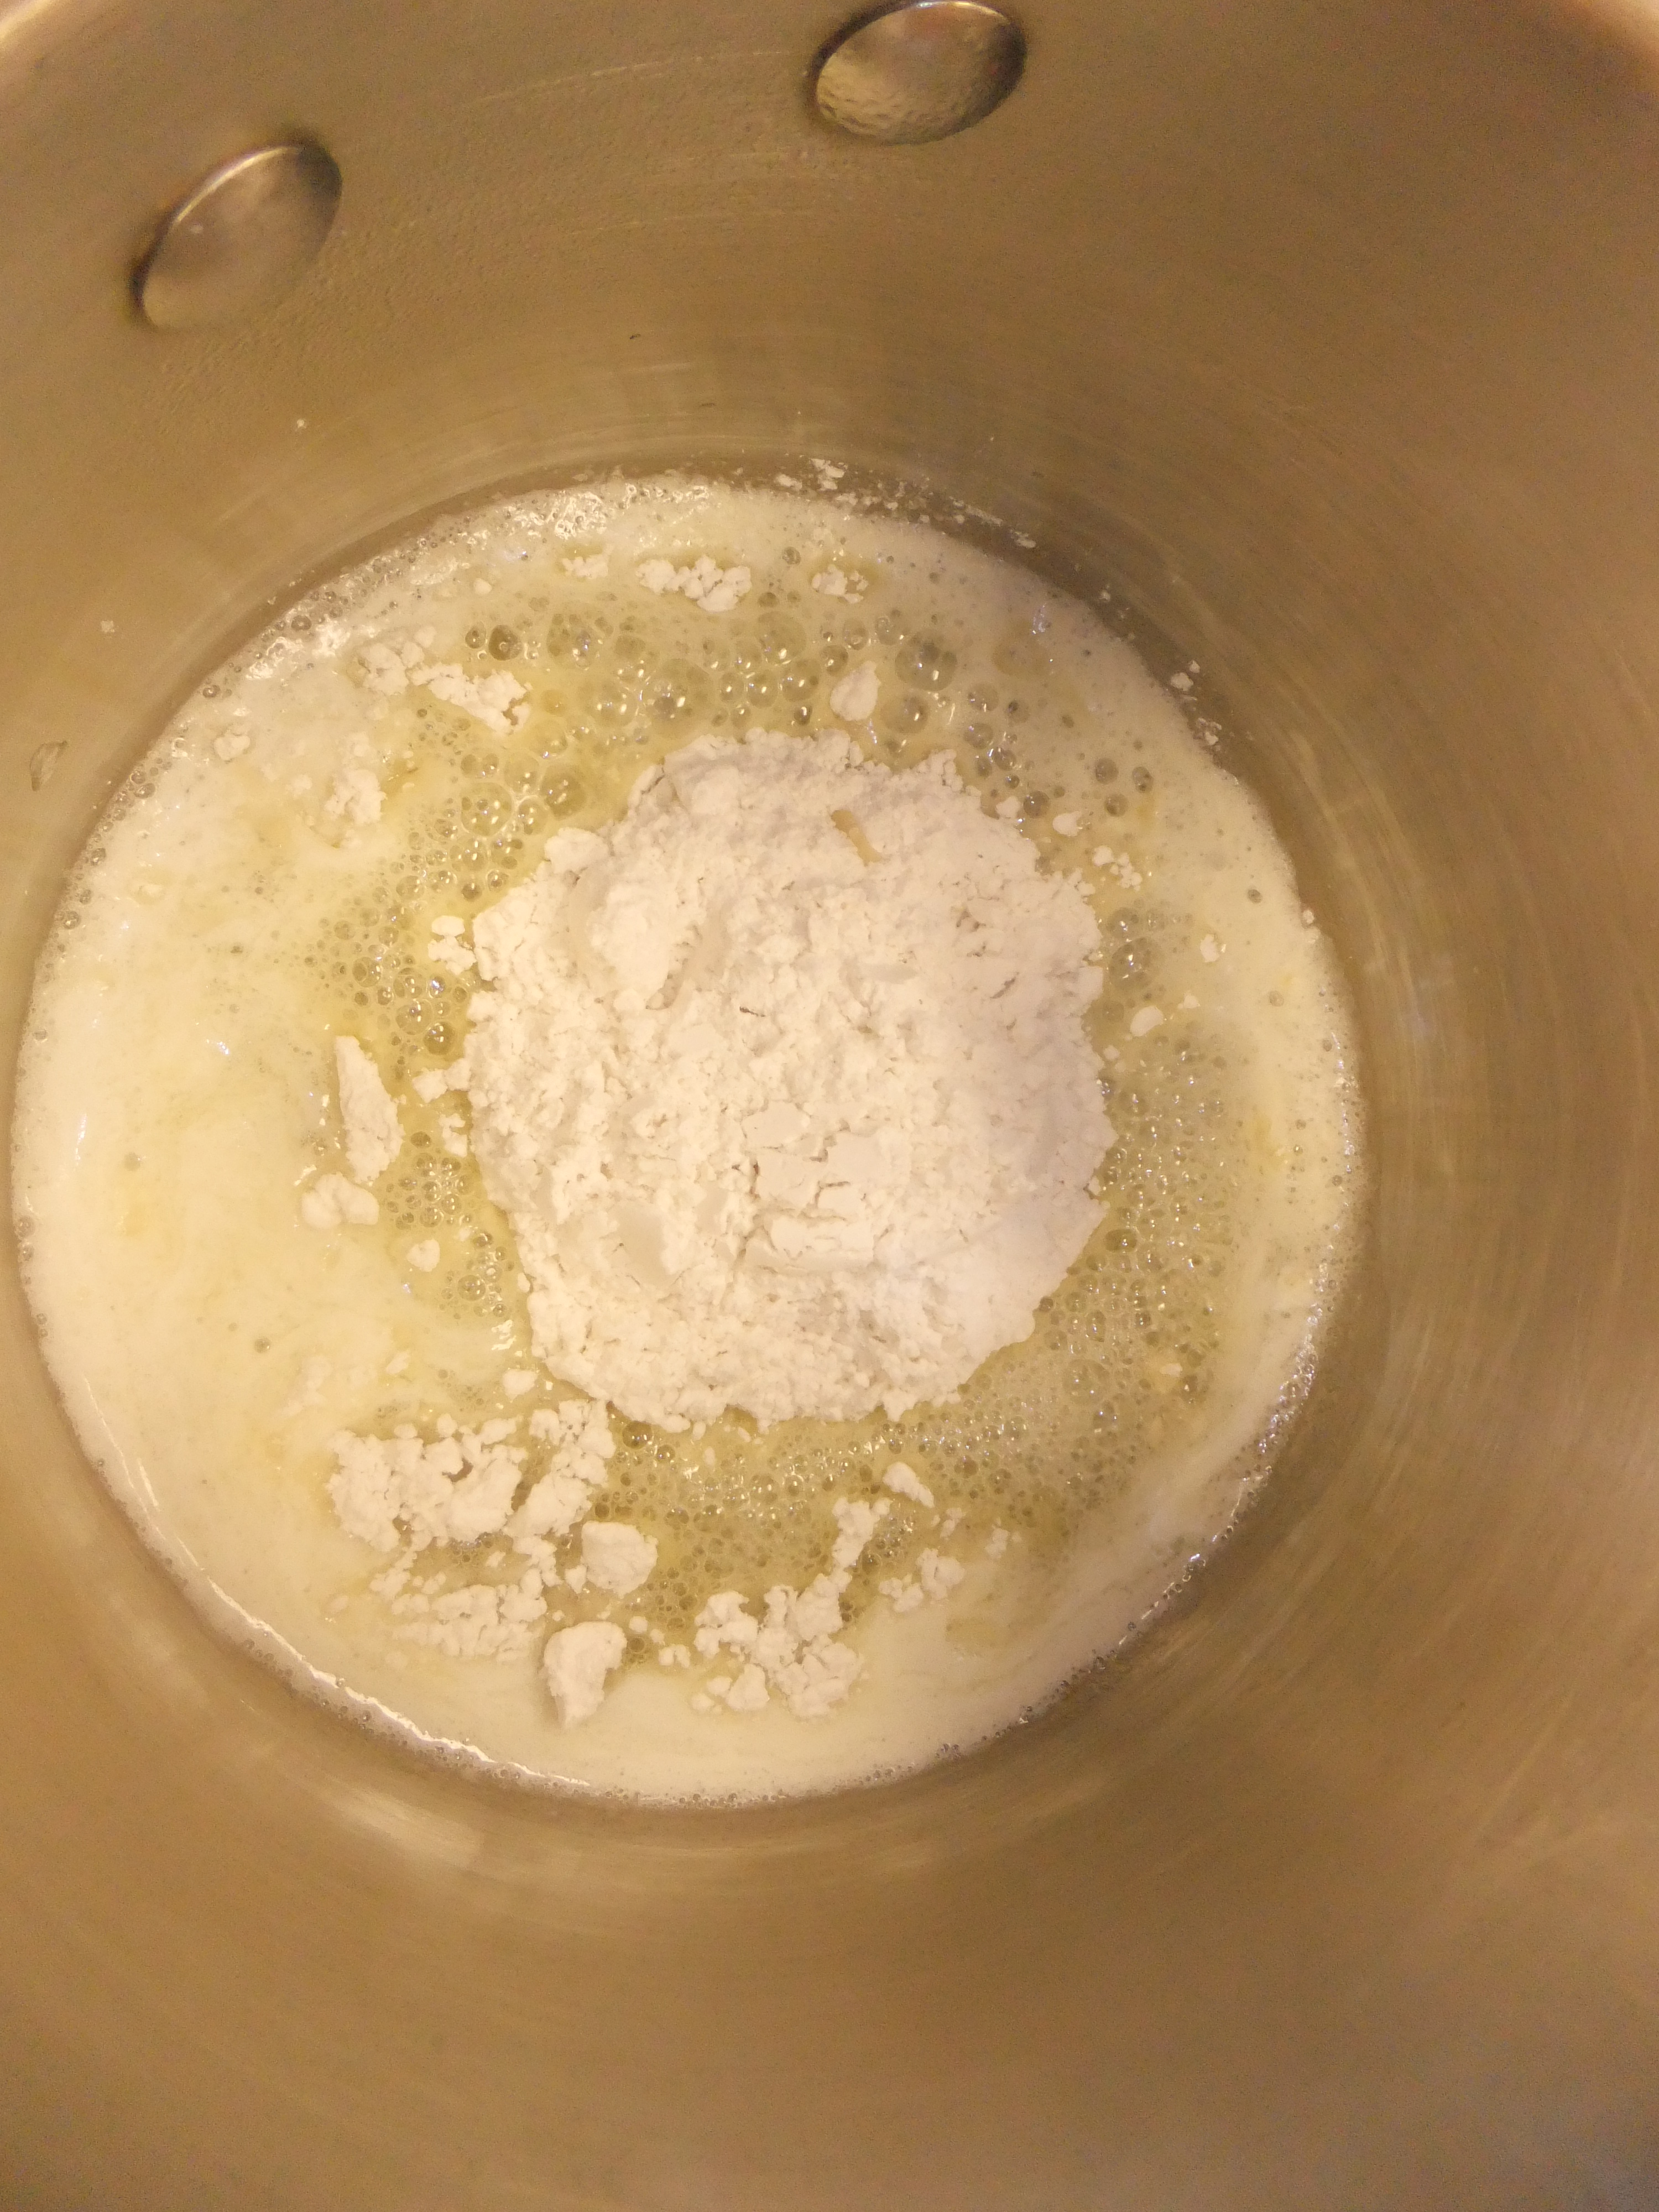
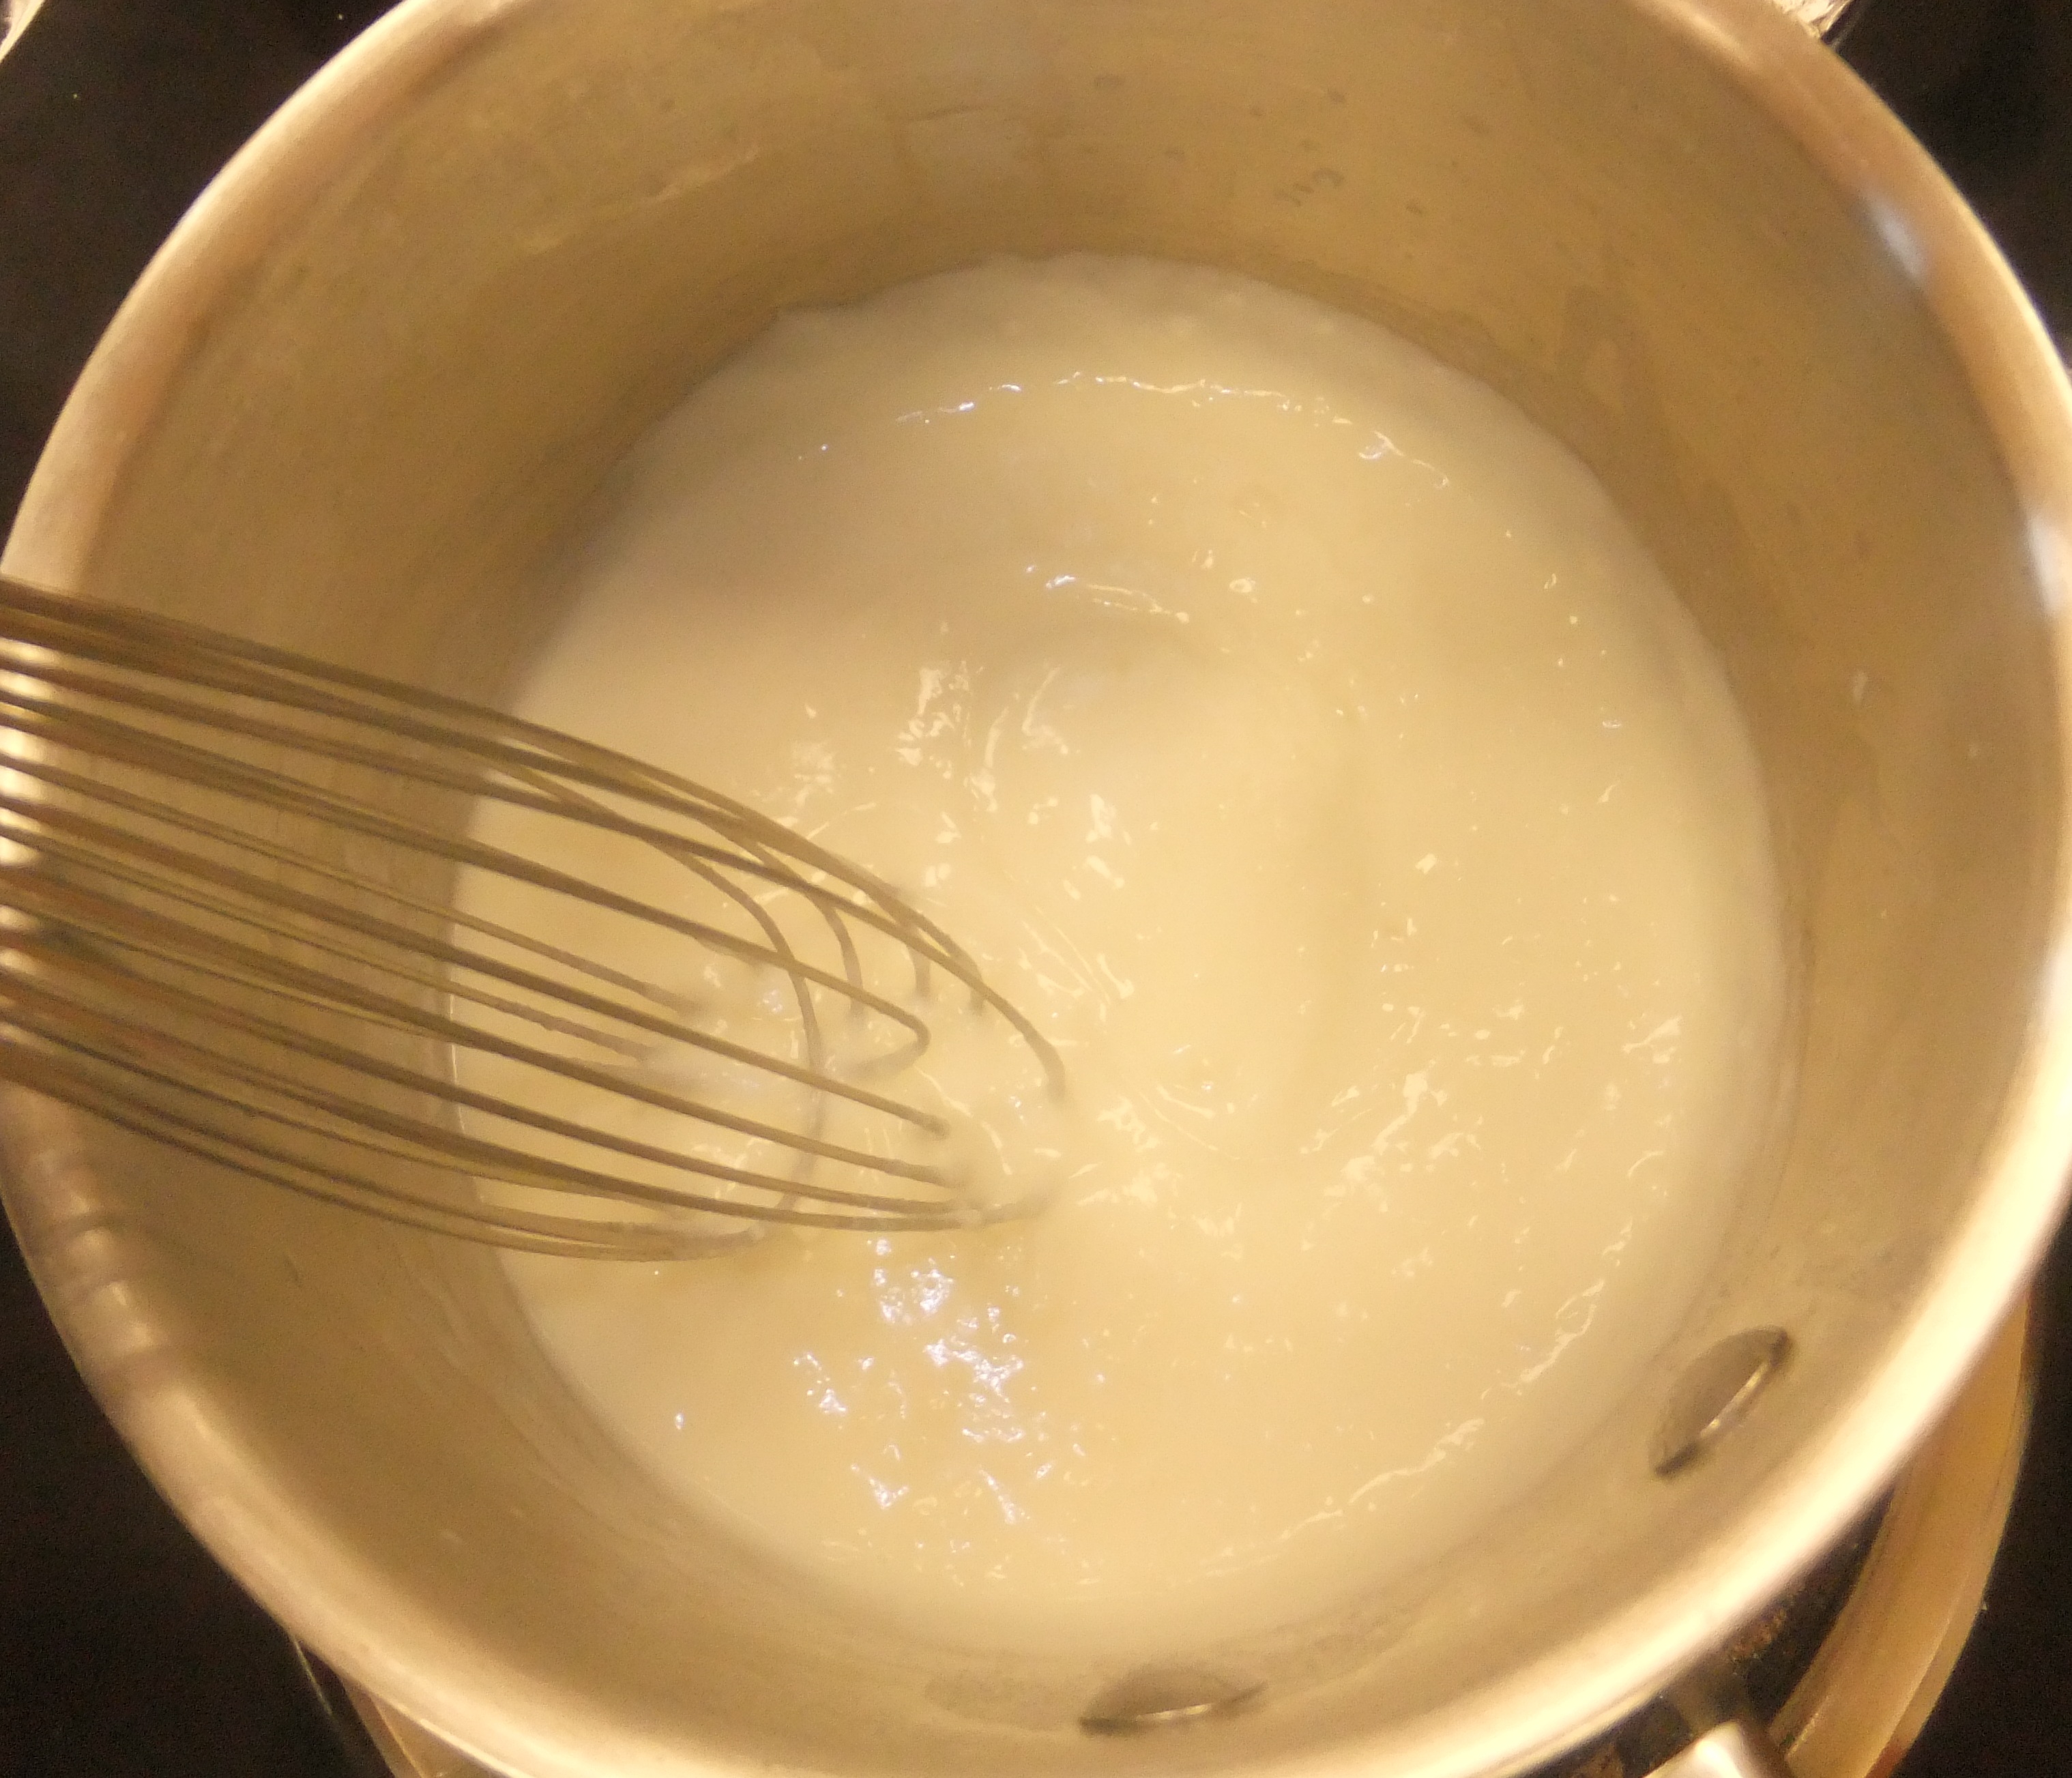
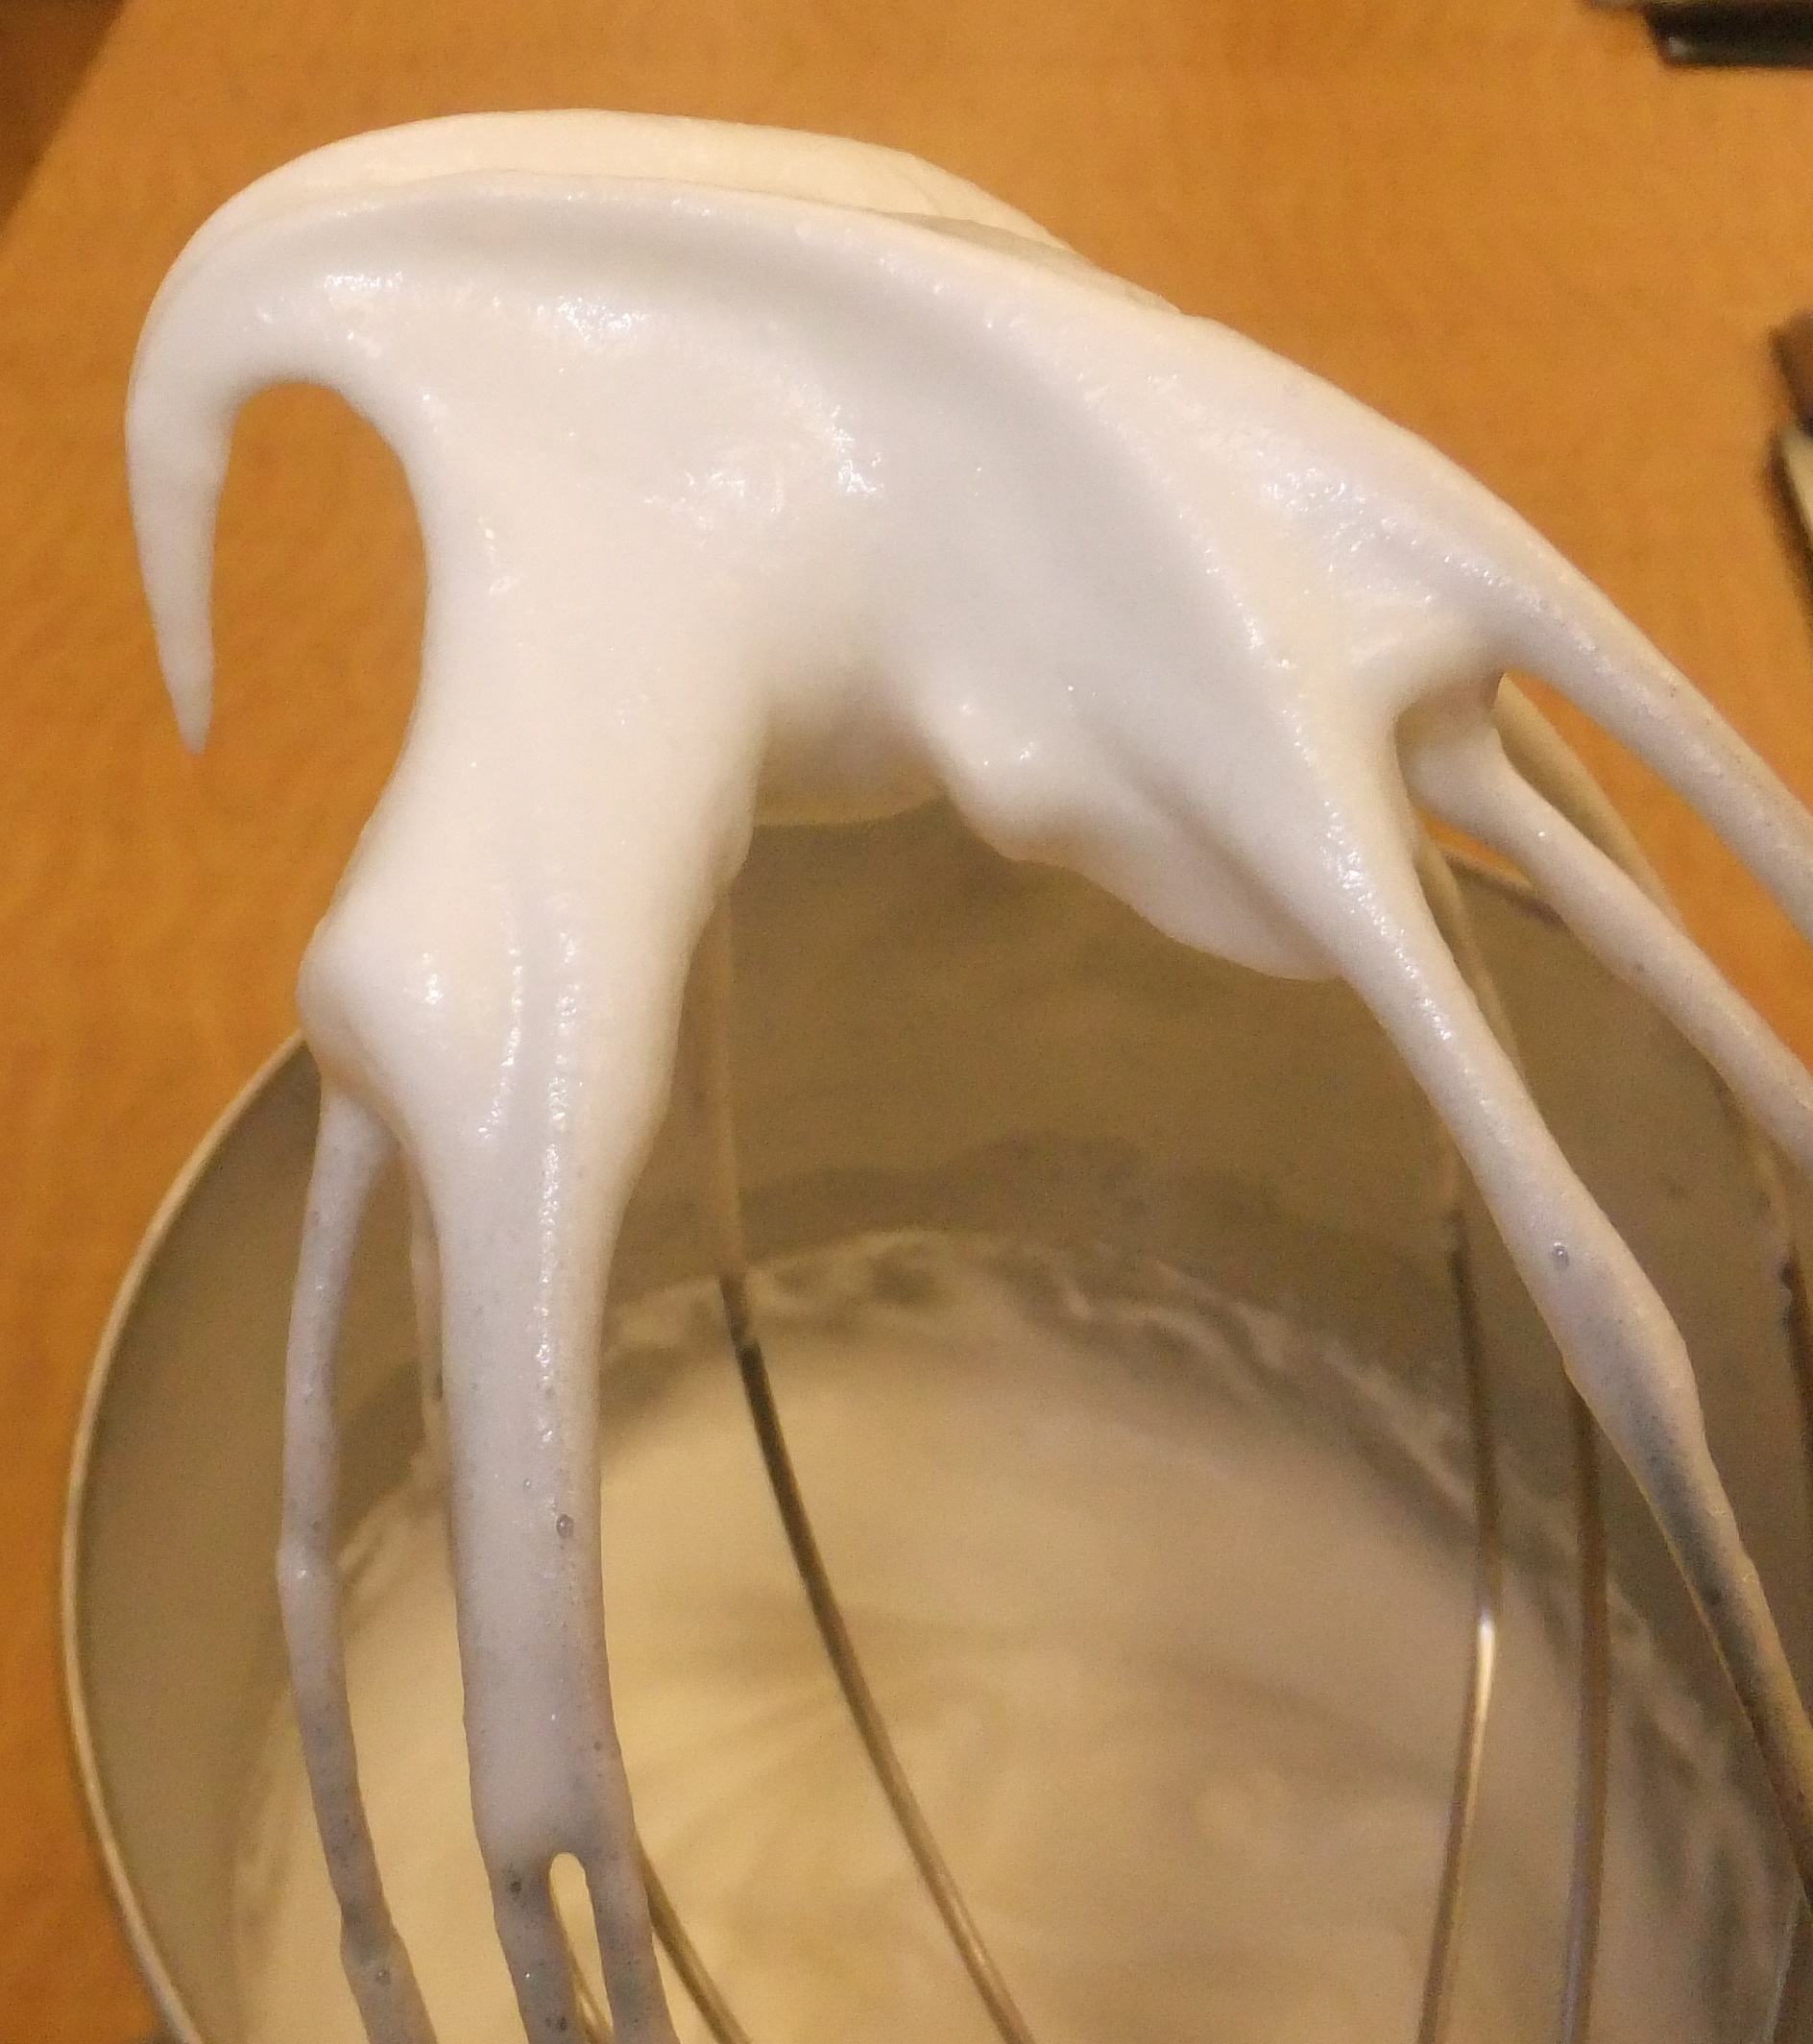
Bring the lemon juice and vanilla to a boil in a small saucepan. Meanwhile, whisk the egg and sugar until well combined. When the lemon juice is boiling, begin whisking the egg and slowly pour the hot lemon juice into the egg, constantly whisking. (This is called tempering, like we did with the soufflés.) Once everything’s combined, pour it all back into the saucepan, and whisk it gently over low heat until it thickens. You’ll know when it’s thick. It will be like lotion. Take the pan off the heat and start adding the butter cubes, 2 or 3 at a time, and whisk until they’re nearly melted. (I helped with this part.) When all the butter’s added, refrigerate your curd until cold and ready to use. Yum! Stored in a closed container, this will keep quite a while, but do you really want it to last that long?


5 Comments

But we’re not French

Mama read a book on how French kids sit still at mealtimes and eat whatever’s on their plates. She thought she could implement the same system with me. (What she doesn’t know is that she almost succeeded, but then she started working, and now I eat at a very American daycare with very American kids.) But the point of this blog post isn’t to document Mama’s frustrations with me as I continue to throw food (though I do think she’s pretty funny when she’s annoyed); it’s to tell you about the lovely cake we made! The book talks about children helping out in the kitchen, something I’ve been doing for a long time now. It goes further to share a recipe for yogurt cake, or gâteau au yaourt, which is the first thing many French kids learn to bake.

I can see why. It’s so simple! Of course, there’s yogurt in it, and then almost all the other ingredients are measured with the empty yogurt containers. Mama bought lemon yogurt, which she poured into a large bowl. She spooned sugar into one container, which I dutifully dumped in. I then stirred the sugar and yogurt together, testing as I went along to make sure everything tasted right. Then Mama added a teaspoon of vanilla, a little less than a container of canola oil, and 2 eggs. She let me continue to stir but said I couldn’t taste anymore because of the eggs.

Mama had a lot of trust in me here.

Now that the eggs are in, I had to stop sampling. (Note my yogurt mustache.)

Then she spooned flour into the containers (4 of them, in total) and let me dump them into another bowl. She had to show me how to do it because I started to pour the flour towards me, instead of away from me and into the big bowl! (How was I supposed to know?) Mama added half a tablespoon baking powder and let me stir it all together. I liked using my hands to mix it, and it looked so nice on the countertop… and the chair and the floor and my clothes. After that, she added the flour to the egg bowl and stirred it really well. (She thought this might be a better job for her.)

Jude mixes up the dry stuff

I don’t know why anyone would bother with a spatula to stir a cake when a hand works so much better.

Mama showed me how to grease the cake pan with the canola oil, then she poured the cake batter into it. I smoothed out the cake, and into a 375° oven it went.

I’ve heard cake batter is pretty good, but Mama stopped me before I could taste any.

I nearly forgot about it, but I suppose it took 30–40 minutes to bake, and before I knew it, there was a cake! Mama cut a slice to share with me. She said it’s not the prettiest cake she’s ever made, but it sure tasted the best since we made it together. (To be honest, it seemed like I did most of the work.)

I'm in my play kitchen with a real cake!

It looks like I made this cake in my play kitchen, but I didn’t.

I liked the lemony taste to the cake, and it wasn’t too sweet. (It would be delicious with blueberries or raspberries!) It was heavy, though, so I didn’t feel like I needed a whole piece to myself. (Mama, however, had other designs in mind.) I like helping Mama in the kitchen, and Papa was very pleased to see we baked a cake. If this is what being a French kid is all about, then sign me up. In fact, my passport arrived last week.

Love, Jude


4 Comments

S-mmmmm-oothies

Some kids get smoothies year-round, but Mama likes them in the summer when the fruit is fresh and ripe. But even though the weather’s been cool off and on lately, Mama’s decided smoothie season has begun. At least for me. She tells me she used to make a big blender of smoothie for her and Papa, but now she just uses a cup and this funny little machine she calls a hand blender. She lets me help hold it when it goes whirrrrr! and before I know it all the chunks of pineapple, banana, and mango are blended with the yogurt and coconut milk, and it’s all smooth and creamy.

Smooth + creamy = smoothie?!

Sometimes Mama adds a bit of local honey. Other times, she adds cinnamon or cardamom. Today Mama added something called flax. Not bad. Mama says smoothies are really good for me. I love everything that goes into them, so what’s not to like? The part about a smoothie I like the most is that I can drink it with a straw, and I can take it with me (though I’m not supposed to leave the kitchen with it).

Love, Jude

This is my special smoothie cup. It's been getting a lot of use lately.


1 Comment

Brown bagging it

Boy, this daycare thing is really getting in the way of my blogging. Between all the playing with cars and the taking of 2-hour naps, I can’t get a word in. Sigh… It’s not like I haven’t been eating. Take, for example, what Mama sends with me to daycare. She found out some of the typical foods they feed us for lunch and decided to make her own versions for me to eat. One thing is cheesy macaroni, which I eat much better at Miss Rose’s house than I do at home. (Don’t tell Mama.)

Then there’s the fish sticks and chicken nuggets. Mama says she wrestled with this one because she feels “chicken” nuggets are the go-to choice of not just parents, but of restaurants everywhere. Have a kid? Give him a nugget. (She’s judging restaurants here, not parents.) She doesn’t want me to get used to this sort of “cuisine,” and she worries about what’s actually in said nuggets. Her compromise: control everything.

Unfortunately, we haven’t had a lot of time to cook together lately, so Mama made these while I slept. I can only share her recipe, but note that I did not witness the making-of moments. I can, however, attest to their yumminess.

Love, Jude

Chicken Nuggets/Fish Sticks
1 cup (more or less) flour (whatever you have on hand)
1 egg, lightly beaten (add a splash of milk, if you like)
1 cup (more or less) breadcrumbs (make your own with the heels of loaves and a food processor, or use the canned stuff)
1–3 chicken breasts or 1–2 firm white fish fillets (haddock, flounder, cod), cut into appropriate-size pieces
Coconut oil for frying
Sea salt and pepper for seasoning

First things first: Season everything! Set the flour, egg, and breadcrumbs in separate shallow containers, and add salt & pepper to each one. Salt and pepper your chicken or fish, too. Melt about a tablespoon of coconut oil in a large frying pan over medium heat. Toss a few pieces of chicken (or fish) into the flour and toss them to coat. Then dip them into the egg, coating entirely. Then toss them into the breadcrumbs, making sure they’re completely covered. Set onto a clean plate while the oil heats and you do a couple more; this also gives the coating some time to adhere. (If you do all this with one hand, it keeps your other hand clean to add more flour or breadcrumbs, if needed, or to scratch your nose.) When the oil is hot, add the pieces, one by one, until the bottom of the pan is covered, but the pieces aren’t touching. (You need to give them space.) Coconut oil burns quickly, so as the pan starts to dry, don’t be stingy about adding more. (It’s good for babies!) When the pieces are dark golden on one side, turn them over, silly, and cook the other. Remove them to a paper towel–lined plate while you cook the rest. Give one to a non-vegetarian in the house to be sure they’re cooked through. If you make lots, you can freeze some for later. Just reheat and serve.

Notes: I know Mama would say, if you’re doing chicken and fish at the same time, to cook two entirely separate batches. Don’t use any of the chickeny flour/egg/breadcrumbs for the fish. She would also point out that all of these ingredients are organic/free-range/wild caught, but I think you know that by now.


3 Comments

J’adore soufflés

By now, it’s no secret that I love eggs. I’ll take them any way I can get them. But Mama says people are a little afraid of soufflés because they have a reputation for being temperamental [insert joke about soufflés being like Mama here]. Kidding aside, Mama showed me that there’s nothing to fear about this puffy little delicacy whose name comes from the French word for  “blow.” I blow on my food when it’s hot, and just yesterday I blew my first bubbles outside, so I’m excited to learn how to make these.

First, Mama said we have to make a “roo.” We’ve made this before by melting butter in a saucepan, then whisking in flour until it’s all cooked and bubbly. Then we add milk. Mama says some people say to use cold milk, while others say to use hot milk. She “splits the difference” by using milk that’s been taken out of the fridge for a little while, “just to take the chill off.” Once the milk’s added to the saucepan, we stir and stir until it thickens. (Well, Mama took care of the stirring because it was very hot.) She said this is what’s called a béchamel, but it looked like a white sauce to me.

When butter's all foamy, add the flour all at once and start whisking.

When butter’s all foamy, add the flour all at once and start whisking.

This is how the white sauce will look once all the floury clumps are worked in to the milk.

This is how the white sauce will look once all the floury clumps are worked in to the milk.

This next part is where it starts to get a little scary. You have to separate your eggs. I don’t quite understand how sometimes I can crack the eggs and roll them around and the shell comes off, and other times, Mama cracks the egg and out comes a runny gloppy mess. But this is one of those times when Mama has to crack the eggs. She notes that the whites must be meticulously free of yolk, and because she doesn’t take her own advice to separate the eggs one at a time over a small bowl (and then dumping each white into a larger bowl), she creates an opportunity to show me how to remove errant yolk from the white: use the shell to scoop it out!

Now Mama sets aside the bowl of whites and sets the bowl of yolks on a damp dishcloth—she explains that it’s to keep the bowl from sliding when she “tempers” the yolks.  (I thought this must be why soufflés are considered temperamental, but Mama says it’s how you bring hot and cold liquids together without ruining them.) She whisks the yolks to break them up, and then she pours a little of the hot white sauce into them, whisking the whole time. She adds a bit more sauce, still whisking, and keeps at this until all the sauce is in the yolks. Now you have your soufflé base. Mama says this is the time to add any flavors—crumbled cooked bacon, puréed or small-dice cooked veggies, cheese, fruit, finely ground nuts, chocolate—but we’re keeping it plain today.

Mama notes that here’s a good place to stop, if you have to. If you’re making soufflés for breakfast the next day or for dessert later on, this is where you should stop, put everything in the fridge, then take it out about a half an hour before you want to resume cooking—to “take the chill off.” That’s when you should turn on your oven, too. But before finishing the recipe, there’s one more thing to be done: prepare the ramekins. I didn’t know these could be used in the oven or for food other than mine. Mama always used to feed me from these…until I discovered that they break into so many pieces when they hit the floor. (I’m just learning about gravity, you know.) Brush melted butter all around the inside of each ramekin (or other small ovenproof dish), then dust each with either parmesan cheese (if savory) or sugar (if sweet). (Mama thinks finely chopped nuts might work, too.) This step, Mama says, gives the soufflé something to grab onto as it climbs up the ramekin. Mama set the prepared ramekins on a baking sheet.

These are sugared.

These are sugared.

Next, Mama turned her attention to the egg whites. She plugged in the mixer and began to beat them until they formed soft peaks.

See how the "peak" flops over?

See how the “peak” flops over?

Then she folded the whites into the yolk mixture, being careful to not overmix—she explained that if she stirred too vigorously, she could deflate the whites, which would not bode well for the soufflés. Mama says that as soon as the whites are folded in, it’s time to pour the mixture into the prepared ramekins. Fill them nearly to the top (most ramekins have an inner rim that’s a good marking spot). She sprinkled a bit more parmesan on top and popped them in the oven.

Then we waited. Mama said we may not open the oven to check on them, otherwise they’ll deflat like a balloon. So when the time was up, we turned on the oven light to take a peek. Those soufflés had puffed up like my grandma’s hairdo and were golden brown. Mama called them gorgeous. The real test was taking them out of the oven… and they held! They stayed puffy until we dug in. They were eggy, and they tasted as soft and fluffy as they looked. I could eat these all day.

Love, Jude

Basic Soufflés

2 Tbsp butter
3 Tbsp flour
1 cup whole milk or half-and-half
4 eggs, separated
Salt and pepper, to taste
1/4 tsp nutmeg (optional)
Melted butter (about 2 Tbsp)
Grated parmesan cheese (or sugar, if making a dessert soufflé) (about 2 Tbsp)

Preheat the oven to 425°F. Brush six 6-ounce ramekins with melted butter, then dust with parmesan cheese (or sugar). Set aside on a baking sheet. Over medium heat, melt the 2 tablespoons butter in a medium saucepan, then add the flour, and cook, whisking constantly, until the flour is incorporated and the mixture begins to bubble, 1–2 minutes. Slowly add the milk and continue to whisk, working out any clumps. Then whisk occasionally until the mixture is hot and begins to thicken, 5–10 minutes. Do not let the mixture boil. Remove from heat and add the salt, pepper, and nutmeg.

Whisking constantly, pour a small amount of the milk mixture into the yolks. Add a bit more milk, continuing to whisk. Then add the remaining milk mixture to the bowl and whisk thoroughly. If adding flavors or cheese, do so now.

Beat the egg whites with a hand mixer on high speed until soft peaks form. Then immediately and carefully fold in to the yolk mixture in three additions. Immediately pour the mixture into the prepared ramekins, up until the inner line. Wipe the rims of any errant mixture. Sprinkle with additional parmesan, if desired.

Bake for 17–18 minutes in the center of the oven, until puffed and golden. The centers should look set and firm. Resist the urge to open the oven to check on them, but when you do take them out, a toothpick inserted into the center should come out clean. Serve immediately.

Yield: 6 soufflés

Note: Mama says it’s not a bad idea to add an additional yolk to the base if you’re going to be adding a lot of stuff to the soufflé; the extra yolk will make the base stronger. Try adding up to ½ cup shredded cheese and either ½ cup vegetable puree or 1/3 cup small-diced cooked vegetables or crumbled cooked bacon to the base (before folding in the egg whites). Some ideas: butternut squash-gruyere-paprika; onion-roasted pepper-rosemary-spinach; artichoke-red pepper-gruyere-thyme; red pepper-fennel-onion; or try blue cheese-walnuts by substituting finely ground walnuts for the parmesan cheese.

Variation: To make a chocolaty soufflé, whisk in 1/2 cup unsweetened cocoa powder and 1/2 cup sugar to the finished white sauce. After the mixture is tempered into the egg yolks, add 1 tsp vanilla extract. Add 1/4 cup sugar to the egg whites as they’re being whipped to soft peaks. Proceed with the rest of the recipe, but be sure to sugar your ramekins.

Soufflés will fall a little bit (cracking the tops) once they're taken out of the oven, but they really should remain fairly puffy.

Soufflés will fall a little bit (cracking the tops) once they’re taken out of the oven, but they really should remain fairly puffy.


2 Comments

Cockroaches of the Ocean

That’s what Mama calls lobsters. Having never seen an ocean or a cockroach, I wouldn’t know. (I wonder if they look like any of my bathtub sea creatures?) But having come in to some cooked lobster meat, Mama decided to use it for both dinner and breakfast.

Mama told me she’s not too crazy about the stuff, even though she spent a couple years living in an area known for its lobster. Papa loves it, though, and it was he who suggested she save some for breakfast.

Lobster salad it was for dinner. I don’t think I’ve seen Mama whip up something so fast. It came together quicker than egg salad. Mama and Papa seemed to really like it, but I thought it tasted like a pacifier (and I never liked those either). I ate the avocado and had some roasted red pepper soup for dinner instead.

For breakfast… don’t even get me started. It’s no secret I like eggs. But what Mama did to them today is unforgivable. She sautéed diced shallots and chopped tomatoes in butter, poured in a mixture of milk and eggs, and when it was nearly cooked, she added the chopped lobster meat. She finished it with chopped parsley and salt and pepper. She put that plate before me on my high chair tray, and I just shook my head. Mama thought she could coax me into eating it by saying, “Look, it’s just egg.” But even that little bite tasted like the chewy crustacean interloper.

I think I’m starting to understand what a cockroach is—it’s a destroyer of all that is good.

Love, Jude

Lobster Salad
(Amounts are approximate and subjective to taste—but you get the idea)

1–2 cups cooked lobster meat (thawed from frozen is fine), chopped
1 small stalk celery, finely diced
¼ red onion (or 1 shallot), finely diced (you don’t want as much onion as you have celery)
Zest from 1/3 lemon (add a squeeze of juice, if you like)
1–2 Tbsp flat-leaf parsley, chopped
Healthy pinch of kosher salt
Few grinds of black pepper
About 4 Tbsp mayo
Kaiser roll, or other favorite bread product
Sliced avocado

Combine all ingredients in a bowl. Adjust seasonings to taste. The filling should hold together without being gloppy or wet. Serve on a roll (toasted, if you wish) with slices of avocado.

Yield: 2–4 sandwiches, depending on how much you stuff ’em


2 Comments

Breakfast is good all day long

Saturday’s not usually pancake day, but when Mama gets a craving, she gets a craving. And, since she had buttermilk in the fridge from the soda bread, she thought today was as good as any for some pancakes.

Pancakes are pretty simple. Mama said she learned to make them when she was just a little kid using something called a pancake mix (but isn’t that what we’re doing now?). First, she mixed together all the dry ingredients. That’s my favorite part.

Here I am, moments after I helped mix the dry ingredients. Mama knows I like to throw things, and flour is no exception.

Then she mixed together the wet, and added the wet stuff to the dry. That’s it! Mama says she might’ve made the pancakes lighter by separating the eggs and mixing the yolks into the batter, whipping the whites until soft peaks, and then folding them into the batter. “But who wants to dirty that many dishes?” she said.

Besides, we thought these flapjacks were nice and puffy as they were. In fact, they were almost crispy on the outside, while the insides stayed fluffy and moist. Mama thinks it was the coconut oil. (My friends Ty and Tora’s mama told us about using coconut oil in the pan. Mama already adds it to a lot of my food, but she hadn’t cooked breakfast with it yet.)

Luckily for us, there are lots of pancakes left over. I wonder if Mama will take Grandma’s advice to freeze some of them, or if she’ll just eat them all herself.

Love, Jude

Pancakes

1 cup whole-wheat flour
1 cup all-purpose flour
2 tsp baking powder
1 Tbsp sugar
3/4 tsp salt
A few dashes of cinnamon, to taste
5 Tbsp unsalted butter, melted
2 cups buttermilk (or other milk–coconut milk would be good)
2 eggs
Splash of vanilla extract
Splash of coconut extract
1 banana, mashed
Coconut oil (or canola oil), for cooking

In a medium bowl, whisk together the dry ingredients. In a separate bowl, combine the melted butter and the buttermilk, then add the egg, whisking to break up the yolks. Add the extracts, then pour into the dry ingredients, whisking until well combined. Stir in the banana.

Heat a spoonful of coconut oil in a frying pan over medium heat until hot, then lower the heat a bit (coconut oil starts to smoke). Add spoonfuls of batter to the pan (a little under ¼ cup) and cook until the tops of the pancakes start to bubble. Flip and cook until done, about another minute more. Remove to a plate and keep warm in a 150–200°F oven (or just invert a plate over the stack). Continue making the rest of the batter into pancakes and serve with favorite toppings. (Mama likes grade B maple syrup, and she even let me have a little bit today.)

Yield: 12–14 pancakes


3 Comments

It’s all Greek to me

So… I started daycare this week. And because of that, I haven’t had a lot of time to blog, even though I’ve been eating all kinds of new foods. (I even napped today for 2 hours!) But since there’s so much to tell, I think I’ll just keep tonight simple and write about the spanikopita Mama made.

First, let me tell you that I’m down with spinach. Not everyone is. Even Mama and Papa can only handle it in small quantities. Mama had me eating it when I was quite young, in something she and Papa called “gruel.” She tells me it was steamed organic baby spinach, steamed organic pears, and a mango all pureed together until smooth. Sometimes she let me watch as the blender whirred it up, but mostly, she just gave me the good stuff. I think I must have eaten at least a little bit of gruel every day for a while there. So anyway, Mama wanted to make something that I was sure to eat, but also something that she and Papa would like, too.

She sauteed some scallions (isn’t that a funny word?), then added bunches and bunches of baby spinach, and covered it to cook it all down. In a separate bowl, she combined eggs, very fragrant dill, and lots and lots of feta cheese. I love feta; it’s so salty. While the spinach cooked, Mama took out the phyllo dough. I’ve never seen anything like it before. It’s dough, but it’s very thin—I could almost see right through it. Mama brushed a pie plate with olive oil, laid a sheet of dough in it, then added another sheet. She brushed it again, laid down another sheet. And then another. When the spinach was cooked—it sure shrinks!—she carefully added it to the eggs. You have to keep stirring it, Mama pointed out, otherwise the eggs will scramble. She poured the egg-spinach mixture into the pie plate, then started adding layers of phyllo again, carefully brushing each with olive oil before adding the next. (Melted butter is also acceptable, she noted, as is laying out the sheets of phyllo and rolling it up with the spinach like a log, rather than putting it in a pie plate.) She baked the spinach pie until it was golden, and the kitchen smelled so good.

I loved the egg in this. It really held the spinach in place and gave the whole thing a lovely custardlike texture. And of course eggs and feta go together better than peas and carrots, in my opinion. The phyllo wasn’t my favorite part (Mama felt it could’ve used butter rather than oil), but altogether, I ate two pieces! I even ate the steamed green beans that Mama served with it (and threw only one on the floor).

First naps, now dinner. I don’t know… this daycare thing is having quite an effect on me.

Love, Jude


5 Comments >

No, really, I am. Papa’s grandpap was Irish, so I don’t know what that makes me. (I’m just a baby—I can’t do that kind of math.) So Mama decided to treat us to some Irish fare for dinner. She had all the burners going, plus the oven, so there was a lot to take in.

First, she put a hunk of corned beef in a pot of water and set that to simmer with assorted spices. She would later add chopped cabbage and carrots.

Meanwhile, she started on the shepherd’s pie. First, she sautéed carrots, onion, and celery with salt, pepper, and Worcestershire sauce until the veggies began to soften. Then she added her faux meat, which just needed to be heated through. Sometimes Mama makes a beef shepherd’s pie for Papa, or she does it half-and-half, but since he had the corned beef tonight, she went for a full veggie pie. When the meat and veggies were all combined and hot, she spread them in the bottom of a pie plate. She poured some frozen corn on top of that. She didn’t have any peas—even though we planted some today!—otherwise, she would have added those, too. Meanwhile, she peeled and chopped a couple russet potatoes and boiled them in salted water until they softened. She told me that potatoes can be boiled with or without their skins, but chopping them definitely makes them cook faster. On the back burner, she heated a small saucepan of butter and buttermilk, which she happened to have because she was making soda bread. After the potatoes were cooked, she drained them, returned them to the pot, and mashed them with the hot milk and butter, which she told me keeps the potatoes from being lumpy. She spread the potatoes over the corn and popped the pie into the oven.

But not before she made Irish soda bread. She wanted a quick recipe, and boy did she find it. I’ve made bread with Mama before, and this recipe seemed more like scones to me. That’s how easy it was. We mixed a few ingredients, shaped it into a loaf, and into the oven it went. We couldn’t find dried currants, though, so we used raisins. I love raisins. Then Mama made honey butter to go with it. Then we just had to wait for it all to cook. (I helped Papa take down the storm windows. He let me use a screwdriver!)

Even Mama was a little surprised all this was done at the same time.

Sometimes I have a funny reaction to potatoes, and sometimes to corn, and sometimes even to carrots. Not funny-ha-ha, but rather funny-I-don’t-like-it. Not tonight, though. I thought the shepherd’s pie was really tasty. I even tried to feed myself with my own fork, but I became impatient with that. I didn’t have the corned beef, but Mama says I can have that for lunch tomorrow, even though she knows I don’t do leftovers. Papa declared it “delicious.” And the soda bread was soft on the inside and crunchy on the outside; it was yummy with the honey butter.

This shepherd’s pie was pretty good. Now, if only someone would explain to me what those shamrocks have to do with it…

I got down from my high chair, danced a jig to Flogging Molly, and went to bed with a full belly. Happy St. Patrick’s Day!

Love, Jude

Shepherd’s Pie

Canola oil (or other, favorite cooking oil)
2 carrots, peeled and diced small
2 stalks organic celery, diced small
½ onion, diced small
1–2 dashes Worcestershire sauce
Salt and pepper
1 package soy crumbles or other meat replacement (or 1 pound grass-fed ground beef)
½ package (8–12 oz.) frozen corn
½ package (8–12 oz.) frozen peas
2–3 large organic russet potatoes (or 4–6 red bliss potatoes), chopped large
4 Tbsp butter, melted (optional)
1/3–1/2 cup buttermilk, milk, or cream, heated (optional)

Preheat oven to 350°F (375° is okay, if you’re doing the soda bread at the same time).

Coat the bottom of a skillet with oil, then sauté the veggies until they begin to soften and caramelize. Season with W. sauce and s&p. Add the soy crumbles and heat through. (If using ground beef, sauté this first, breaking it up into small bits, until cooked through. Remove from the pan with a slotted spoon and cook the veggies in the remaining fat. Then combine it all before proceeding.) Place in a pie plate.

Top with corn and peas. (If omitting either corn or peas, use the full package of the other.)

Meanwhile, boil the potatoes in salted water until soft. Drain, return to the pot, then add melted butter and hot milk, if using. Season with s&p, if necessary, then spread over the corn & peas.

Bake, uncovered, for 40–60 minutes, until the potatoes start to brown. (You may dot the top with butter before baking, if desired.)

Note: Mama said if you really don’t want to cook the carrots, onion, and celery, you can add a packet of onion soup mix to the soy crumbles or ground beef and omit the W. sauce and s&p. Regarding organic produce, Mama tells me something called the Environmental Working Group publishes an annual list on the worst pesticide offenders. Celery is #2, and potatoes are #9. Onions, sweet corn, and peas are #s 1, 2, and 6, respectively, on the list of foods that are okay to buy nonorganic (if you really wanted to).

Honey Butter

1 stick unsalted butter, softened
1–2 Tbsp honey (to taste)
Sprinkle of cinnamon

Mash all the ingredients together in a bowl. Serve with warm bread.


14 Comments

Code name: “Kale Puff”

That’s what my cousins call me. When Mama and I visited them last summer (my first time on an airplane!), they thought it was both funny and sad that mama doesn’t give me much sugar to eat. Instead of fishy-shaped crackers and animal-shaped cookies, I get organic puffs. Sometimes Mama buys the banana ones, but when we were in Wisconsin, she happened to buy the kale kind. And we haven’t heard the end of it since.

For the record, I like kale puffs. I like all puffs. They were nice to eat before I had any teeth because they dissolved in my mouth, and they helped me hone my pincer grasp—something every baby needs to learn how to do. I didn’t really eat them as a snack, though. Instead, Mama would put a few puffs in a snacking cup for me when I started getting antsy about my car seat. “If you want puffs, you have to get in your car seat,” she still says. And because she worries that I might choke while she’s driving, she still gives me puffs, even though I now have four molars.

But back to my cousins. Mama says we come from a long line of good bakers, where you couldn’t visit someone without having several sweet options to nosh on. It’s something everyone comes to expect. Grandma always—always—has a pie or cookies or quick breads in the oven. It was she who taught Mama to take cookies out of the oven a bit early and let them finish baking on the cookie sheet to make them crisp on the edges while soft in the middle. (Apparently, this is a good thing, though I wouldn’t know, since I’ve never had a cookie.)

So everyone was a little surprised that Mama doesn’t feed me sugar—and more than a little repulsed by the idea of kale puffs. The cousins kept patting my head, saying things like, “Aww, poor baby…” Grandma always made fancy cakes for everyone’s birthdays (except for Uncle Scotty, who gets a coconut cream pie and a lemon meringue pie). Even though it was a few weeks before my birthday, Grandma wanted to make me a cake. She had a challenge ahead of her, as I still wasn’t up to whole eggs yet, and there was the whole sugar thing to contend with.

Well, Grandma took the challenge by storm. She made a banana cake using applesauce instead of eggs and brown sugar instead of white—and Mama convinced her that she didn’t even need all of what was called for in the recipe. She made plain whipped cream for the “icing,” which I dutifully smashed. But nobody wanted to try the cake… not right away, anyway. The cousins wouldn’t touch it, but my GeeGee and Aunt Karen liked it. And I thought it was pretty good too.

I made a pretty good mess of my birthday cake.

Mama would want me to point out that she hasn’t banned all sugar. I do get some, sometimes. She baked gingerbread biscotti at Christmas, which turned out to be the perfect teething biscuits—they’re hard, they dissolve when wet, and they’re minimally sweetened. She also makes various kinds of scones, which have hardly any sugar in them to begin with, and she sets aside a few for me that she doesn’t dust with sugar before baking. And she makes a variety of fruit-filled muffins with lower-than-called-for amounts of sugar, and usually she substitutes brown sugar (but not always whole-wheat flour). I eat lots of sweet potatoes. I don’t drink juice, even watered down, but I eat a lot of fruit. We skip pre-made yogurt, and instead make fruit smoothies with the plain stuff. But don’t think I’m immune to sugar. I can totally tell the difference when Mama tries to substitute something like puffed kamut in my snacking cup. She muses that if she had started with the kamut, rather than with the puffs, I might not have minded the difference, but they’re just too bland for me.

This is the first time I tried a marshmallow--Mama made it. It was squishy-soft and very sweet. I had just a couple baby bites.

So why have sugar at all? Why does Mama bother baking all these goodies if she has to alter recipes for me (or give me just a nibble, if she makes it full-fledged)? She can’t help herself, for one thing. She feels kids should experience the joy of stirring flour and eggs and oil—and yes, sugar—in a bowl, putting it in the oven, and as if by magic, taking out something completely transformed and delicious. I have to say, I like when she lets me help her. (That flour really flies far and gets all over the place!) Mama’s also careful of when she gives me any sort of sweet treat—not when I’m being fussy, and usually when I’ve already eaten something sensible. And she would also say it’s a “control thing.” She likes to be in control of the amount of sugar I put into my body, so she doesn’t accept the lollipop from the bank teller or the cookie from the nice lady at the bakery. She feels I have plenty of time to eat all the sugar I’ll ever want, so why rush it? She believes in real, whole food–which includes the occasional homemade treat. And one mini zucchini muffin is so much better than that box of Girl Scout cookies she has hiding in the cupboard, wouldn’t you agree?

Love, Jude

For Mama's chocolate cheesecake, she let me taste the batter before she added the eggs. Boy, was that good! I don't think I've ever had chocolate before (or since).

Pumpkin Muffins

1 cup all-purpose flour
1 cup whole-wheat flour
1½ tsp baking soda
1½ tsp cinnamon
¾ tsp salt
½ tsp nutmeg
½ tsp ground ginger
½ tsp allspice
½ tsp cloves
2 cups cooked pumpkin (from a pumpkin that was roasted; may also use a 15-oz can of pumpkin puree)
¾ cup firmly packed brown sugar
3 large eggs
½ cup canola oil (use ¾ cup if you use solid pack pumpkin, rather than pureed)
1 cup raisins or dried cranberries (optional)

Preheat oven to 350°. Line a muffin tin with cupcake liners or spray liberally with cooking spray.

Whisk together the flours, soda, and spices in a medium bowl. In a large bowl, whisk together the pumpkin, brown sugar, eggs, and oil. Add the dry ingredients to the wet and stir to combine. Add the raisins or cranberries, if using. Scoop the batter into the prepared tins.

Bake mini-muffins for about 15 minutes, regular muffins about 18 minutes. (They should feel firm, yet spongy, to the touch; or a toothpick inserted into the center should come out clean.) Cool in the pan a few minutes, then remove to a wire rack to cool completely. Store in an airtight container. These also freeze well.

Yield: 1 dozen regular muffins + 1 dozen minis

Note: Mama says if you use an ice-cream scoop to put the batter into the tins, it’s not only faster, but your muffins will turn out to be the same size. Mama also says roasting a pumpkin is almost as easy as roasting a squash—just cut it, scoop out the seeds, and bake it in a pan with a little water until it’s soft. Just don’t use “face” pumpkins (the kind you’d use for jack-o-lanterns).