LittleJudeonFood

One kid's adventures in gastronomy


4 Comments

Strawberries and Cream

This year, our favorite organic berry-picking patch was overrun by hungry deer, so we couldn’t pick our usual lovely collection. Mama found another patch, though it was much less unkempt. Witness the weeds:

I didn't like picking these strawberries because it was too much work. I kept asking Mama to add her berries into my basket.

I didn’t like picking these strawberries because it was too much work hunting for them. I kept asking Mama to add her berries into my basket.

But the berries were warmed by the sun, and they positively burst when I bit into them.

At home, Mama ended up doing all the cleaning, but I helped her by eating a lot of those strawberries so that there were fewer of them for her to clean.

With them, we made a lot of freezer jam. We’ve made it before, but this time Mama tried a new recipe, based loosely on this one. Voilà:

Though all the jars ended up sealing, we're going to store them in the fridge & freezer.

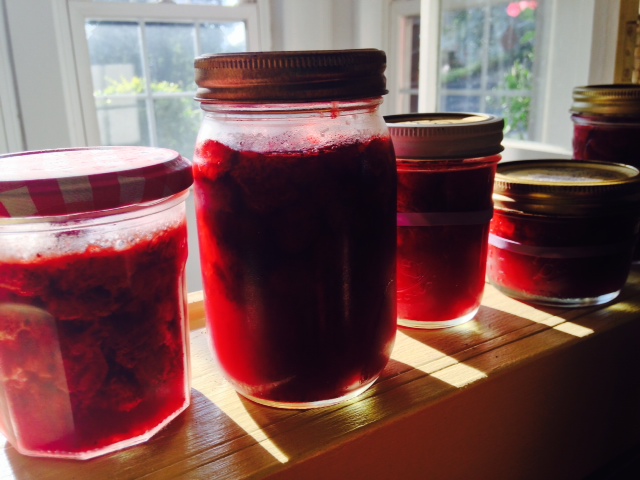
Though all the jars ended up sealing, we’re going to store them in the fridge & freezer.

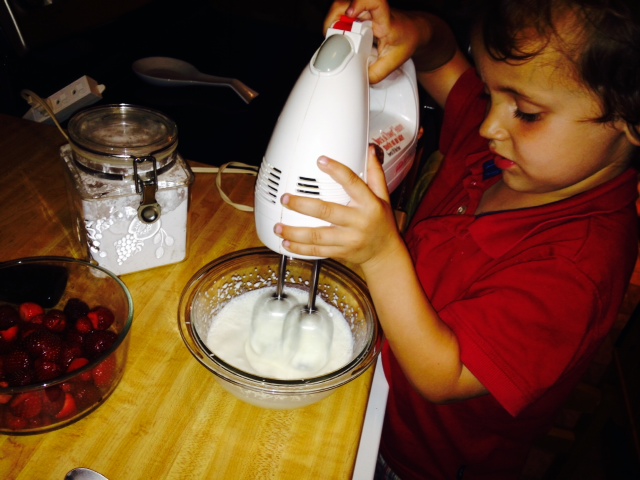
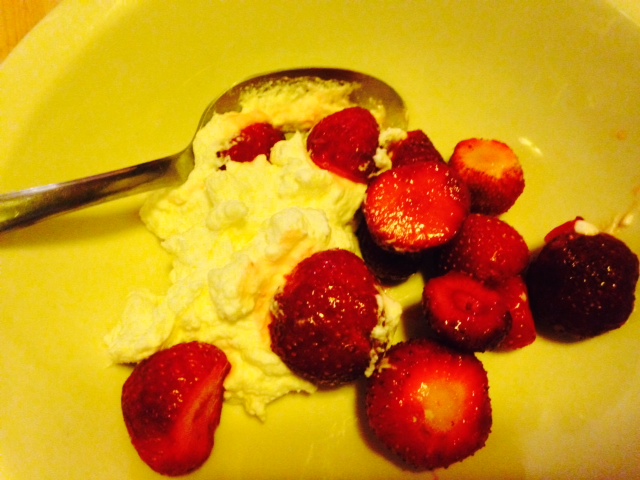
But the real show stopper, the easiest and most delicious part, was the fresh berries with whipped cream we ate for dessert. Mama says anyone with a whisk can whip cream, but not everyone does it correctly. She showed me how to do it right.

First, we kept everything cold, including the bowl and the beaters. Mama said this isn’t strictly necessary, but it’s been pretty hot out lately, so better to be safe—you’ll get a better whip with cold equipment. (She also wanted to save her arms by not whipping it by hand, though she suggests everyone ought to give that a try sometime.)

Mama explained that the only cream that’s going to whip is heavy cream, or whipping cream (either one will work). If you try to whip light cream or half-and-half, you’ll be whipping until I turn 4. This is because of the fat content (the fat is what holds it together). She also explained that plain whipped cream tastes about as bland as… well, plain whipping cream. Bleck.

Jude on Food: Flavor everything!

To remedy this, Mama showed me how to make chantilly cream. If you’re feeling fancy, you can pronounce it “shahn-tee-ee,” but I’m really good at making “L” sounds, so I’m going to stick with that. Chantilly is basically sweetened whipped cream with added vanilla.

You can find all sorts of recipes for basic chantilly cream, but Mama’s advice is to taste it once it’s beginning to whip up. If it needs more vanilla (or other flavoring, such as orange, lemon, or almond), add it. If it could be sweeter, sprinkle in more sugar. As for the type of sweetener you use, regular sugar works fine, but Mama likes to use confectioners’ sugar—that’s the soft powdery kind we sometimes put on crepes. She told me she’s never tried other sweeteners, but she supposes they would work just as well. (If you try one, let us know!)

Two other things Mama noted about making whipped cream: 1) go slowly—if you rush it by turning your mixer on high speed, you’ll not only splatter cream everywhere (as I found out), but you’ll heat up the cream, and it’ll take longer. 2) Don’t overwhip it.

whipping cream/littlejudeonfood.com

Whip it–whip it real good!

The problem with overwhipping cream isn’t the taste. It’s the texture. Even I don’t want my whipped cream to look like cottage cheese. Ewww, right? You can whip it to soft peaks or stiff peaks, but if you go beyond that, you can’t do much with it…except, maybe stuff it into something.

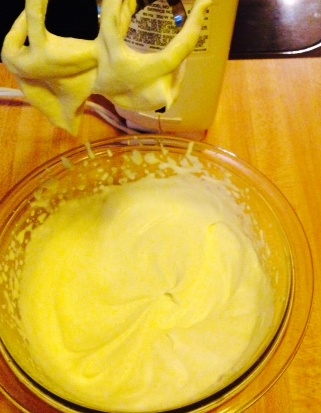
Because it’s just Mama and me right now (Papa’s out of town), she showed me what would happen if we pushed the cream too far:

Who am I kidding? I'd still eat that.

Who am I kidding? I’d still eat that.

Mama let me beat the cream at first (note the splatters), but then took over to finish the job. I took this picture (and about 18 more like it):

Do you see the trails that are created by the beaters? They're loosely holding their shape, but they're still very soft.

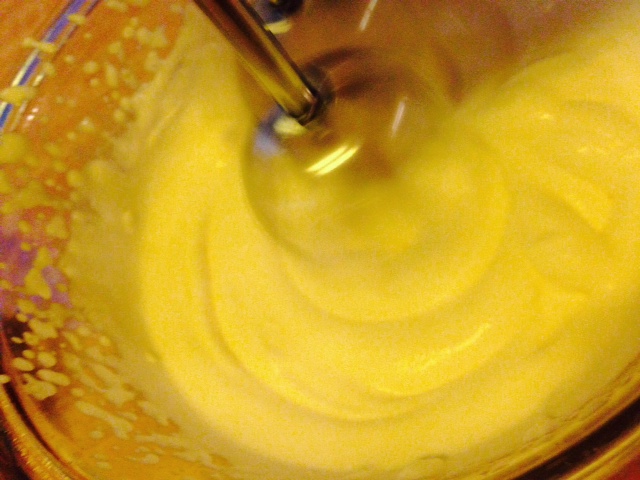
See the trails that are created by the beaters? They’re loosely holding their shape, but they’re still very soft.

Another way to tell when the cream is getting close is to stop beating it and check how it looks on the beater.

The whipped cream is just clinging to the beaters, and there's a soft little peak down in the bowl.

The whipped cream is just clinging to the beaters, and there’s a soft little peak down in the bowl.

From here to ruin is a short path, so beat carefully from now on. If you’re planning to pipe the cream, you’ll want stiffer peaks, as they’ll hold their shape. If you’re looking for just a bit of billowy adornment, as we want for our berries, then stop when they’re soft.

Stiff cream will hold in the fridge, covered, for a day or so. Soft cream should be used pretty soon after it’s made. If it starts to weep, give it a light whipping with a whisk before using.

berries and cream/littlejudeonfood.com

And what’s not to like about having a little whipped cream on hand?

Love, Jude

Chantilly Cream

1 cup cold heavy cream or whipping cream*
1 Tbsp powdered sugar (or, to taste)
1/2 tsp vanilla extract (or, to taste)

Place cream, sugar, and vanilla in a medium bowl and beat at low speed with an electric mixer (or in the bowl of a stand mixer with whip attachment); alternatively, use a whisk. When the cream begins to take shape, you may increase your speed a little bit more, but not more than medium. Move the beaters around the bowl and rotate the bowl to ensure you reach all the edges. Beat until desired stiffness, then serve or store until ready to use.

This dessert is Mama approved AND Jude approved.

This dessert is Mama approved AND Jude approved.

Note: For an extra-special treat, try whipping crème fraiche. As sour cream’s sophisticated (and more pricey) cousin, it’s tangy and makes for a great complement to lemon curd and supersweet berries.

For a vegan alternative, put a can of full-fat coconut milk in the fridge overnight. Without shaking it, take it out of the fridge, remove the lid, and scoop out the solid white part. (Reserve the watery portion for smoothies.) Whip & flavor the white solids like you would cream.


3 Comments

Dessert on the grill?

Yes!

Mama went and made that bluecherry pie, and the house has been hot ever since. She brought home some lovely, luscious apricots from a farm stand, and she decided it would be worthwhile to adapt a simple oven recipe to the grill (since she was using it to cook dinner anyway).

Apricots are at their peak right now. In fact, they’re probably on their way out in most places. Mama will be lucky if she can get any more this weekend (but she sure put up a heckofa lot of them). The little ones you get in grocery stores in early June don’t have anything on the sweetness and suppleness of those freshly picked from the tree. And they’re the perfect size for me to hold as I munch around the center stone, which actually comes out fairly easily. (But whether I throw said stone or give it to Mama to throw away is anyone’s guess.)

Mama says you can grill fruit directly on the hot grates. She lightly oils or sprays either the fruit or the grates. Sometimes she mixes a bit of honey with something sour like lemon or lime juice and brushes that on the cut side of the fruit. And that’s it. Grill it until it has grill marks on it and gets somewhat soft. If you want to push it until it’s very soft with deep grill marks, that’s up to you!

For this recipe, however, Mama used foil and closed the lid of the grill to simulate the inside of an oven. The foil caught the fruit juices, as well as the melted butter and brown sugar, so there was no mess to clean up afterward.

A pat of butter, a spoon of brown sugar, and a hot grill are all these little apricots need to become just a little more special.

A pat of butter, a spoon of brown sugar, and a hot grill are all these little apricots need to become just a little more special.

The good news: I got to enjoy these with ice cream!! (The secret news: I would’ve eaten them without it, they were so scrumptious.)

The warm apricots started melting the pecan ice cream. Mmm....

The warm apricots started melting the pecan ice cream. Mmm….

Go ahead an try this with any type of stone fruit–plums, peaches, nectarines. But don’t forget to try it with apricots.

Love, Jude

Grilled Sweet Apricots

3 apricots, halved & pitted
1 tablespoon butter, cut into 6 pieces
1 tablespoon brown sugar

Get your grill going. Ours is gas, and Mama had it on medium-low, but it still got up to about 400°F. Place apricot halves, cut side up, on a sheet of aluminum foil. (You can do this directly on the grill, as Mama did, or prepare them ahead of time and transfer the entire sheet of foil to the grates.) Add 1 piece of butter and ½ teaspoon brown sugar to the center of each apricot. Close the lid of the grill and cook until butter & sugar are melted and apricots are soft and gooey, 10–15 minutes. Perfect as a treat on their own, or even better with ice cream. Be sure you eat all those sugary, buttery juices, too.

Serves 3 people.

Note: You don’t have to be exact about the measurements, and clearly, you can increase and decrease the amounts for as many apricots as you like. If you want to make these in the oven, lightly spray your baking pan and bake at 350°F for 15 minutes, or until they’re soft and starting to turn golden.


2 Comments

Pie making for beginners

Because Papa just came home from two weeks abroad, Mama decided to treat him to one of his favorite pies—the sour cherry. And because she recently picked blueberries, she figured she’d toss a few of those in there as well. Behold: the “bluecherry” pie.

Pie recipes abound, particularly in the summer months, and they all seem to have their own recipe for what goes on the bottom. Whether you call it pâte brisée, pâte sucrée, pie crust, or pastry dough, Mama suggests finding a pie dough recipe that works for you and sticking with it. That way, you’ll always have it in your back pocket if you’re in the mood to make a pie. (I don’t know why you’d keep a recipe in your back pocket all the time; I’m just telling you what she said.)

A basic recipe is 3 parts flour, 2 parts fat, and 1 part cold water by weight. There’s no magic in the fat you use (butter, cream cheese, coconut oil, lard);  it’s really just a personal preference. Mama likes the idea of an all-butter crust for its flavor and flakiness (and its naturalness, of course), but a 50-50 butter-shortening crust is a little easier to work with. Whatever you choose, keep your fat cold. Cube it then put it back in the refrigerator while you assemble the rest of your ingredients. Same with your water. You want that to be cold-cold-cold. Mama says this is because you don’t want your fat to melt before it goes into the oven. If it melts beforehand, it won’t have a chance to release steam as it melts—and the steam is what causes those heavenly layers of flakiness in any good crust. Do you think your croissant would be so light and airy if the baker used warm butter? Think again!

Before making your dough, gather your flour, sugar, salt, and butter--but get that butter back into the fridge as soon as you dice it.

Before making your dough, gather your flour, sugar, salt, and butter–but get that butter back into the fridge as soon as you dice it.

You can make your crust by hand or in a food processor, which is easier, but then you have to clean it. Mama tends to make it by hand because she has better control over it. If you use the food processor, only ever pulse it—don’t run it! Combine your dry ingredients first. At its simplest, this would be just flour (or a combination of flours), but you really ought to add a pinch of salt for flavor, as well as a bit of sugar. If you’re making a savory crust, omit the sugar and experiment with some herbs.

Add the fat (butter in this case) and cut it into the flour. You can use forks, two butter knives, or this handy pastry blender.

I was overzealous in cutting in the butter, and flour landed in my eye.

I was overzealous in cutting in the butter, and flour landed in my eye.

You want to break up the butter into smaller pieces while coating those pieces in flour. Some folks say it should resemble peas, but peas are green, and I just don’t see how this looks like peas.

This is what your dough should look like before you add the water. Do YOU see any peas in there?

This is what your dough should look like before you add the water. Do YOU see any peas in there?

Now you add your water. Drizzle it over the dough (or run it through the feed tube of the food processor while pulsing), then stir with a fork. You can start with about ¼ cup water, then add about 1 tablespoon at a time to get it to the consistency you want. Mama says there’s never a precise measure for this, as a lot of factors are variable: if your kitchen is warm, if your butter is starting to melt, if your water isn’t supercold (I did tell you to put it in the fridge), if you’re using a combination of flours other than all-purpose, etc. What you don’t want is to make a smooth ball of dough. If you end up with this (easy to do in a food processor), you’ve overworked the dough, and it’s going to be tough, rather than flaky. Test it by clumping a bit of the mixture in your hand—if it holds together, it’s wet enough.

See how the dough in the bowl doesn't look like dough at all? But look what's squished in my hand. Perfection.

See how the dough in the bowl doesn’t look like dough at all? But look what’s squished in my hand. Perfection.

Turn it out onto a counter then gather it all together. Again, don’t overwork it. If it’s sort of shaggy at this stage, that’s alright. Don’t manhandle your dough, and you’ll get a tender crust in return. Form it into a disk (or 2, if you’re making a pie with a top crust—but make one disk slightly larger than the other), wrap it well in plastic wrap, then refrigerate for a minimum of 30–60 minutes. This gives the gluten time to relax. Gluten is the protein in flour that holds the crust together and gives bread dough its structure. But like a toddler without a nap, it’s a little temperamental and needs some time to chill out.

You don't need a perfectly smooth ball of dough right now. Remember that you're going to take a rolling pin to it after it chills.

You don’t need a perfectly smooth ball of dough right now. Remember that you’re going to take a rolling pin to it after it chills. (Do you like my shirt? Grrr.)

When you’re ready to assemble your pie, lightly flour your work surface and your rolling pin. Roll the dough in all directions (rotate the dough, not your body), taking care not to roll your rolling pin off the edge of the dough—just go to the edge. Keep rotating, so you know the dough’s not sticking to your counter and so that you roll a relatively even shape.

If you look closely, you can see butter smooshed into the dough--they're the lighter colored splotches. That's what you want!

If you look closely, you can see butter smooshed into the dough–they’re the lighter colored splotches. That’s what you want!

Transfer the dough into the pie plate (wrap it over your rolling pin to keep it from stretching).

Gently roll the dough around the rolling pin, bring it to the pie plate, then unroll the dough.

Gently roll the dough around the rolling pin, bring it to the pie plate, then unroll the dough.

Some folks put the bottom dough back into the fridge for 15 minutes. If you have yet to prepare your filling, then go ahead and put the crust in the fridge in the meantime. If you’re blind-baking your crust (that is, baking it without any filling), it can go right in the oven. Either way, when you’re ready, fill your pie and top it with the other disk of rolled-out dough, if using. And don’t forget to save your dough scraps. Wrap them well and store them in the freezer, as they make for a very easy last-minute dinner or even a lazy-day pie.

Mama does this very simply—some might call her work “rustic.” Have fun with various types of topping. You can roll it out, tear it into pieces, then lay a patchwork of dough on top. (You could also just tear small chunks of dough off the dough ball and flatten them with your hands and skip the rolling altogether.) You can roll it out smaller than the size of the pie and lay it on top, without touching the edge of the bottom crust, making a “floating” crust. You can lay it on top and flute the edges or press them together with the tines of a fork. Or, you can make a lattice.

Like everything else, there are a couple ways to make a lattice crust, but here’s one that’s just as easy as…pie. (Come on, you knew that was coming.)

Roll out your top crust, then use a pastry wheel, pizza cutter, or sharp knife to cut strips. Try to keep them as uniform as you can (but you can always call it rustic!). You should have 3 or 4 that are about 10” long, if you’re making a 9” pie. The rest can be shorter. You’ll need 8 strips total. Lightly moisten the edges of your pie crust that’s already in the pie plate; this will help the top crust adhere.

Your strips don't have to have crinkly edges...but their flaw are hidden a bit better.

Your strips don’t have to have crinkly edges…but their flaws are hidden a bit better.

Lay 5 strips vertically across your pie, evenly spaced apart.

You can see the blueberries and cherries and cubes of butter peeking out like they're behind the bars of a crib.

You can see the blueberries and cherries and cubes of butter peeking out like they’re behind the bars of a crib.

Fold down vertical strips 2 & 4, about halfway down. Then lay 1 horizontal strip across the middle, over vertical strips 1, 3, & 5. Then unfold 2 & 4.

lattice step 2/littlejudeonfood.com

Then fold down strips 1, 3, & 5. Lay 1 horizontal strip above the first horizontal strip, over vertical strips 2 & 4. Then unfold 1, 3, & 5.

lattice step 3/littlejudeonfood.com

Either turn your pie 180° so the bottom is now the top, and repeat the previous step. Or fold up (from the bottom) vertical strips 1, 3, & 5. Lay 1 horizontal strip, over vertical strips 2 & 4, beneath the middle strip. Then unfold 1, 3, & 5.

lattice step 4/littlejudeonfood.com

Now crimp the edges of the 2 crusts together. Brush with milk or egg wash (1 egg mixed with 1 Tbsp milk or water) and sprinkle with sugar, if desired.

finished lattice/littlejudeonfood.com

When you make fruit pies, it’s always a good idea to put a foil-lined baking sheet on a rack beneath the pie to catch the inevitable spillover when the fruit juices start bubbling. About halfway through baking, you should rotate your pie too, for even browning.

You can see that the crust is started to get good and golden, but the edges are getting a bit dark.

You can see that the crust is starting to get good and golden, but the edges are turning a bit dark.

It’s also a good time to put pie crust shields or foil around the edge if it’s starting to brown too quickly.

You can use silicone pie crust shields like these, or create your own by tenting foil around the edges.

You can use silicone pie crust shields like these, or create your own by tenting foil around the edges.

As always, allow for the pie to cool, overnight if you can stand it, before cutting into it. This will give the juices time to set, so you’re not eating berry soup over a soggy crust.

Flaky crust of deliciousness...I'm guessing.

Flaky crust of deliciousness…I’m guessing.

I wish I could tell you what bluecherry pie tastes like, but I didn’t eat my dinner (grilled skirt steak with chimichurri), so I didn’t get any. Maybe tonight. Wish me luck.

Love, Jude


Leave a comment

Cake Pops, Baby.

Seeing as I’m just a baby, I don’t exactly know when these became “the thing,” but I find them curious. They’re cake…but they look like lollipops. Not that I have any experience with lollipops, either, but I digress.

When Grandma and GeeGee were visiting, we went to a 4th of July party, and Mama thought it would be fun to give cake pops a try. My Aunt Karen is quite fond of making them, but Grandma’s never done them! Even Mama’s never made something quite like them, what with the cake mix and the canned frosting. She kept musing, out loud, that she should make the cake pops from scratch, including the lolli-stick. (What would you use?) I just wanted to get down and dirty.

So here’s what you do: Bake a 9″ x 13″ cake according to the package directions. Mama chose a white cake, but you can make whatever kind you like. Once it’s cooled, you break it up into a big bowl. Then stir in 1 cup of room temperature pre-made frosting. Again, Mama chose white, but you can choose vanilla or cream cheese or even chocolate. You wouldn’t think that 1 cup is enough, but trust me, it goes a long way.

Now comes the fun part: Reach into the bowl, smoosh your fingers in the cake, then put a big glob in your mouth before your mama can stop you. Repeat as often as necessary, but in the meantime, you scoop out a bit of cake-and-frosting, give it a few squeezes to bring it all together, roll it into a ball, and set the ball on a cookie sheet lined with parchment or waxed paper. Note: Mama had only 24 lollipop sticks, so she and Grandma made the balls pretty big—perhaps too big. They were about the size of golf balls, and GeeGee thought they would’ve been better had they been a bit smaller. You’ll figure it out.

What? Am I not supposed to eat them yet?

Once you’ve made all your balls and have your hands good and messy, go after the dog, paying special attention to smearing your cakey face on her back. That way, she smells like cake the rest of the day! Then, put the cookie sheet in the freezer for about half an hour, to give the balls a chance to firm up. When you’re ready to decorate the pops, put a couple bags of candy melts—those little pastel-colored discs—in a microwavable bowl and zap them in 15-second increments until they’re melted and very smooth. (You can also use chocolate, if you prefer, and skip the microwave in favor of a double boiler, if that method suits you.) Dip the end of a lolli-stick into the melted candy, then stick the candy-coated end about half-way into a ball. Set it back on the cookie sheet and proceed with the rest. When all your cake balls are stuck, go ahead and start dipping them. (But first you might want to test out where you’re going to set the balls to dry once they’ve been dipped. Mama used foam flotation from a floral arrangement, which was kind of messy. A tall glass or vase might put the pops too close to one another—or they could topple. Experiment with a few pops before you dip them.)

Be sure you keep your coating very melty. Return it to the microwave as often as necessary to keep it flowing. Mama bought only 1 bag of blue and 1 bag of red, and we found that having more melted candy than you need is really better than having what you think is going to be just the right amount. To achieve a smooth exterior, you want to be able to swirl your cake pop in one swift stroke and set it out to harden. We ended up having to do a lot of dipping just to get the big balls coated. Depending on what you want to decorate them with—sprinkles, jimmies, or the like—you’ll want to finish that step before setting them out to harden. If you’re just going with decorator’s icing, then allow the cake pops’ coating to set up before you do that. (Mama just grabbed any ol’ thing off the store shelf, and it was something that would work much better on cupcakes. It was too wet for the pops and never set up entirely. They sure were messy!)

We left GeeGee alone with the cake pops, and he decided to start decorating them. They were a real family effort.

So, were they good? Well, people at the party—both adults and kids—went wild over them. I didn’t eat a completely finished product, but I sure did stuff a lot of the mixture in my mouth. And I’m pretty sure I caught Mama eating one…or two. She and Grandma both said they wouldn’t make these again. I hope that isn’t so!

Love, Jude