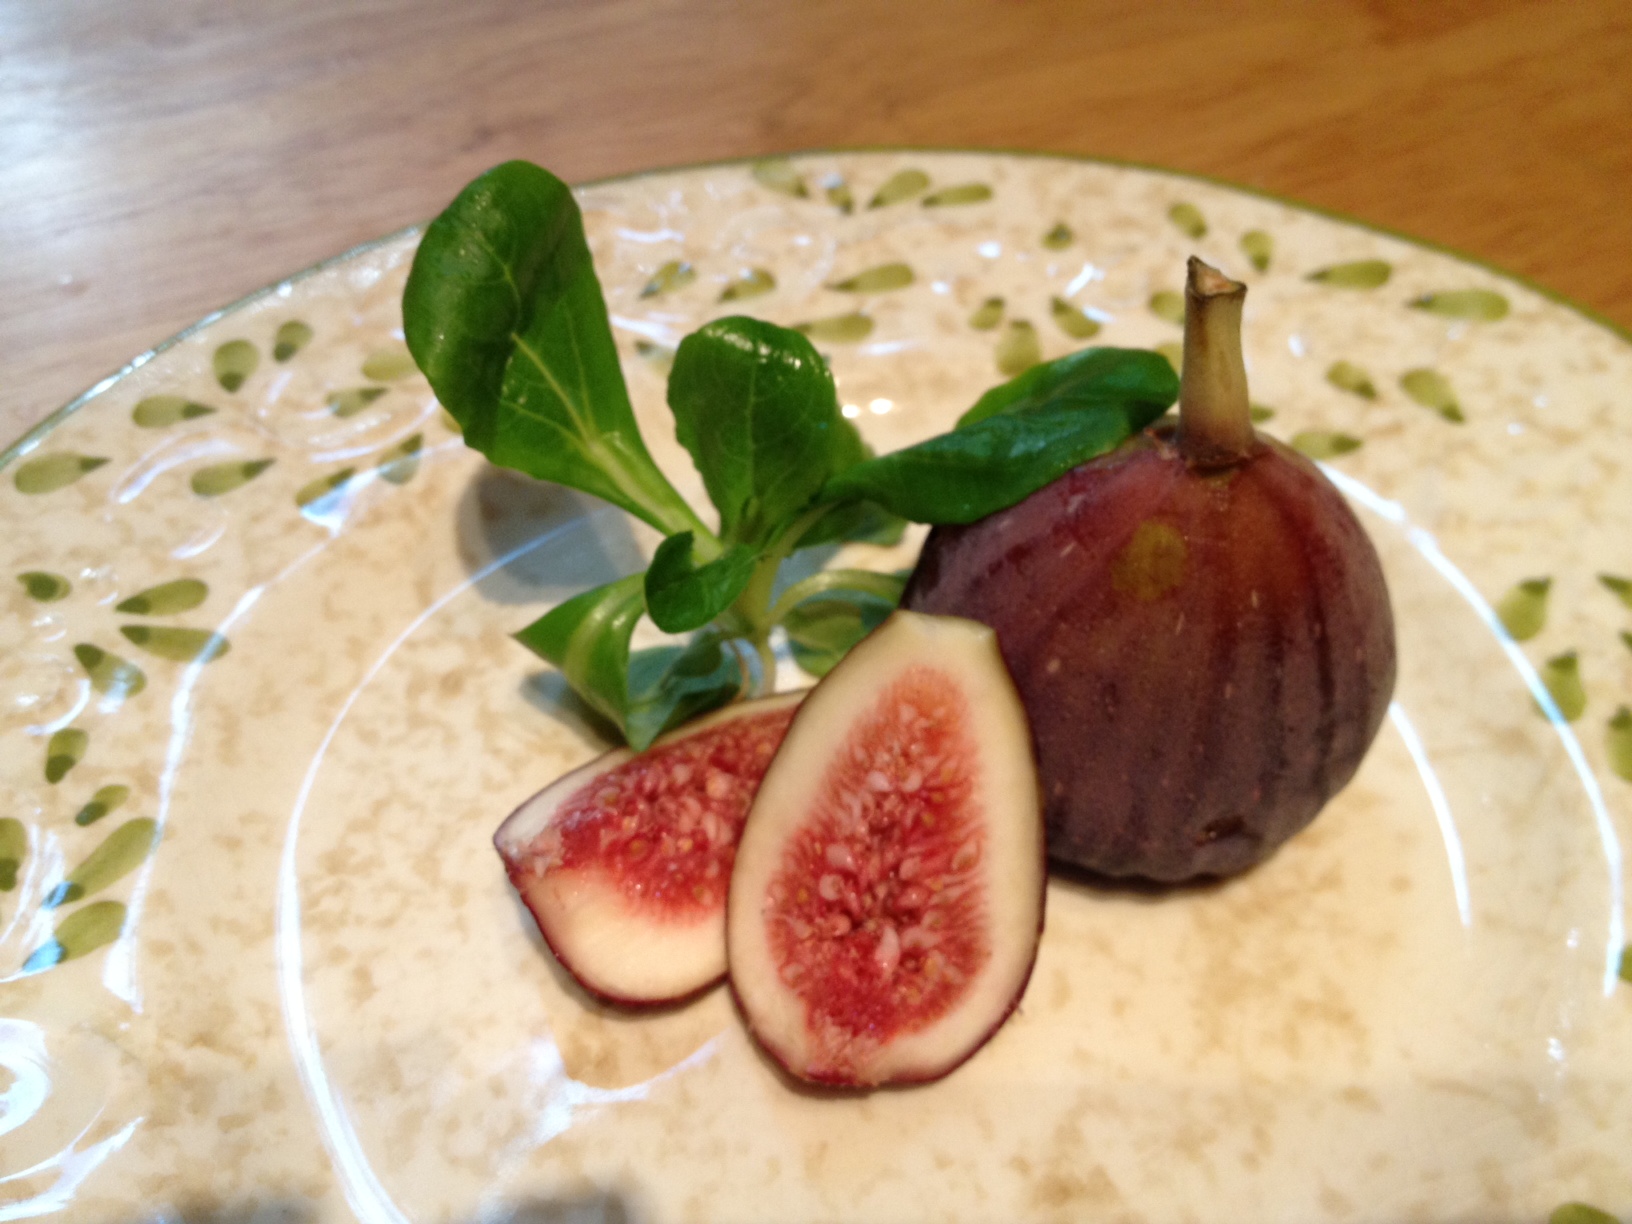
I ate my first figs this week. I didn’t want to, but Mama and Papa kept cajoling me. They were relentless. “It’s sweet,” she’d say. “It tastes kind of like a grape,” he’d say. “You’ll like it,” they’d say. Finally, I took a tentative bite. Then another. The supple flesh yielded a delicate sweetness. I took another bite. Where have these been all my life?
Turns out, they’re not always available. My friend Milo recently picked the first figs from his tree. And, like pomegranates, figs aren’t in stores year-round. You have to wait for them, so savor them!
Incidentally, Fig Newtons are named for the place where they’re made: Newton, MA. Mama says it’s a nice place to visit, particularly in the fall. You also might be interested to know that figs need tiny wasps to pollinate them—wasps that lose their antennae and wings as they excavate a path toward the center of the fruit. I’m sure you can understand what that means: they don’t make it back out! But don’t worry: the fig ends up digesting the wasp, much as we digest the fig, so it’s not like you’re really eating a tiny wasp with every fig. It’s kind of funny to think that, though, isn’t it?
Don’t you just want to take a bite?
Mama gave me some ideas to get you started. There are no recipes, as this is just what she’d put together.
Toast pine nuts in a dry pan while you’re blanching or steaming green beans (which are in season right now!) until bright green. Add the beans to the pan with quartered figs, a pat of butter, then finish with a toss of sea salt and a drizzle of balsamic reduction. Serve alongside a grilled or roasted pork tenderloin.
Whisk together 1 part fig-balsamic vinaigrette and a smidge of Dijon mustard with 2–3 parts olive oil until combined. Season to taste with salt & pepper. Pour over fresh greens, halved figs, crumbled goat cheese, and torn prosciutto.
Halve figs and place them, cut side up, on a baking sheet (lined with foil or parchment). Drizzle honey over them and bake at 350°F until figs are soft and releasing their juices, about 10 minutes. Terrific on their own as a snack, over ice cream, or serve with strawberries or raspberries and Brie or blue cheese.
Caramelize onions or leeks in butter, layer them in a pastry shell (either premade or store bought—or heck, break out the phyllo or puff pastry), top with figs, goat cheese, and fresh thyme, then bake until the crust is done. Finish with a swirl of balsamic reduction. Or skip the tart and pile all this loveliness on a pita, naan, or flatbread for a personal pizza; add some arugula or mache for a subtle peppery or nutty note.
Cook equal parts chopped figs & sugar in a saucepan over medium-low heat until thickened, squishing the fruit as you go along. Now you have jam!
Poach figs in port or Grand Marnier with the seeds of a vanilla bean, and a strip of lemon or orange peel, and aromatics like a cinnamon stick, cloves, or star anise. Then reduce the liquid until it’s of a syrupy consistency. Serve over ice cream, panna cotta, tapioca, or angel food cake.
Slice them, dehydrate them (in a very low oven or in a dehydrator), then toss into salads or granola or mashed sweet potatoes—or simply snack on them as they are.
Bake a basic yellow or almond cake in a jelly roll pan (lined with parchment paper). Carefully lift the cake out of the pan, and cut in half. Spread your fig jam over one half of the cake, lay the other half on top, and slice into even squares. How’s that for a fig newton??
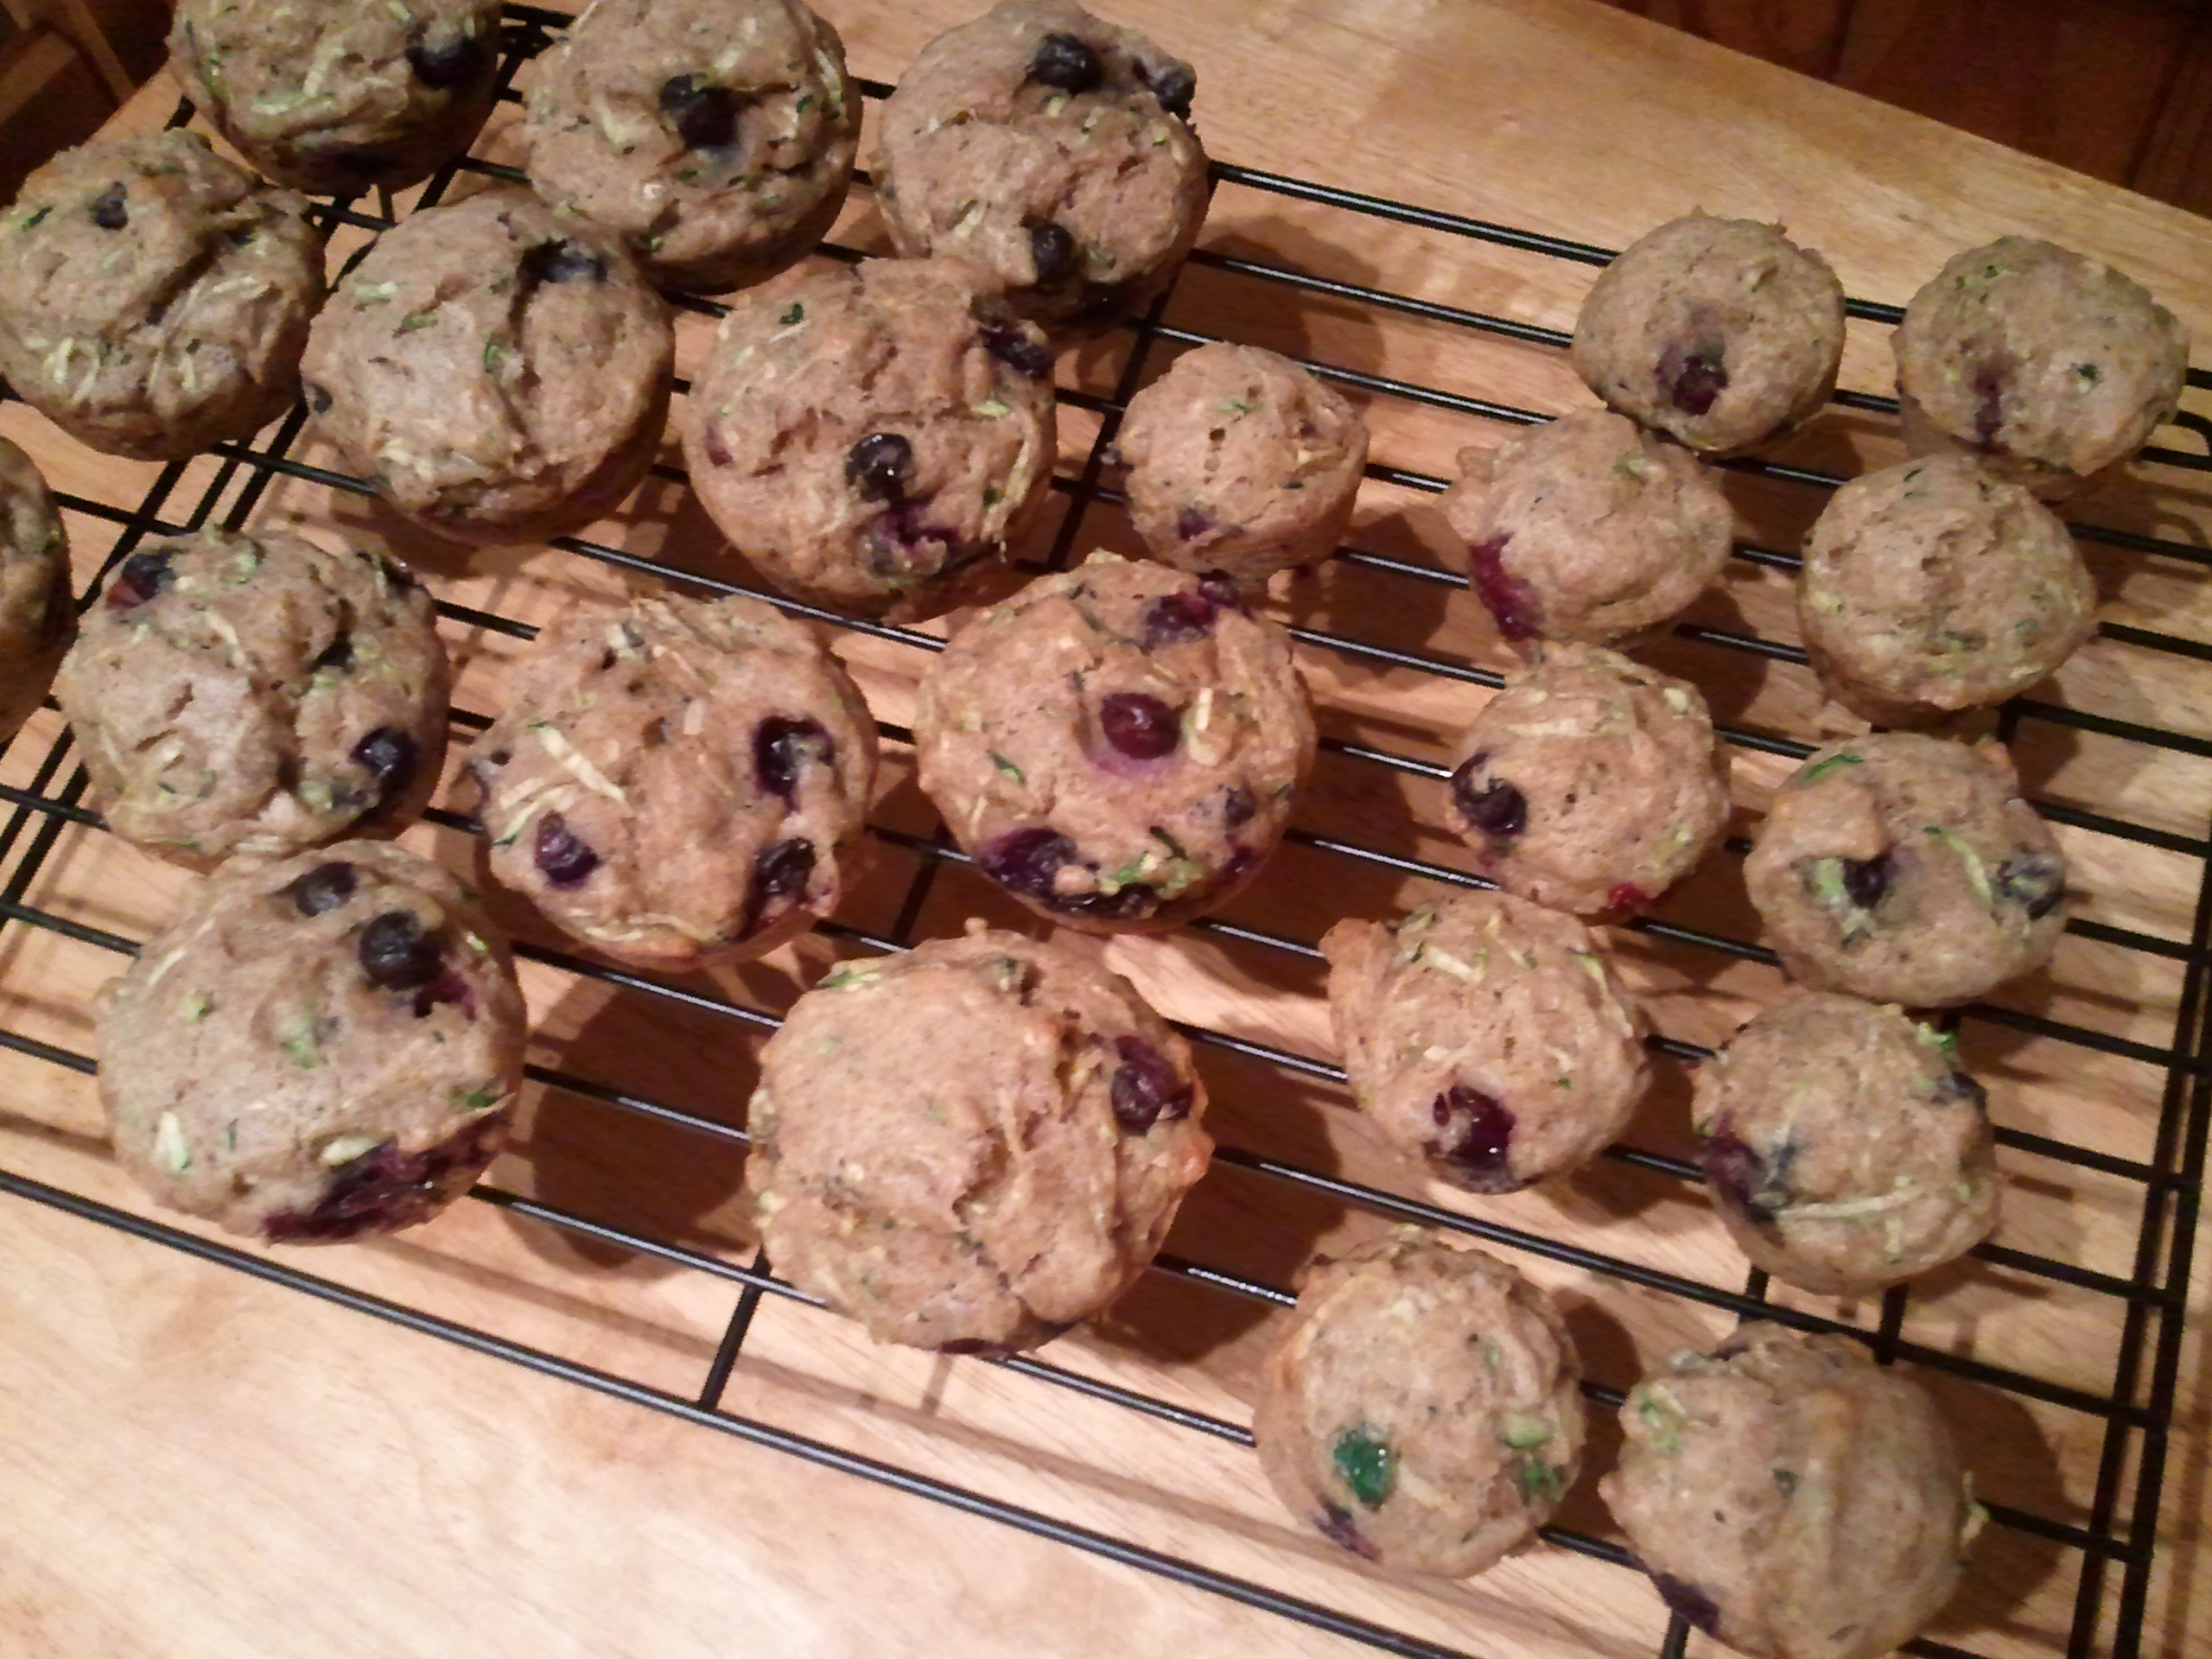
Last year, when I turned 1, Mama made me banana muffins. She made them again this year, but she also made some of her zucchini muffins with all the fresh zucchini we picked up at the farm stand. And she added our bluebies to them!
9 dozen muffins later….
Look at all the blueberries! They burst in my mouth. So yummy.
I like the mini-muffins because I can shove just about the whole thing in my mouth (even though Mama and Papa say, “Don’t stuff!”). I opened my presents and got to blow out candles, all before breakfast.
My new birthday trucks didn’t get in the way of my blowing out the candles on the first try.
Some may speculate now whether I should change the name of my blog, as I’m technically no longer a baby. “Toddler Jude” just doesn’t have the same ring to it. What do you think?
Love, Jude (who’s 2!)
Blueberry-Zucchini Muffins (Dairy-Free)
2 cups unbleached all-purpose flour
1 cup whole-wheat flour
1 tsp. cinnamon
1/2 tsp. nutmeg
2 large farm-fresh eggs
1/3 cup packed brown sugar
2 tsp vanilla
3 cups freshly grated zucchini, drained
2/3 cup canola oil
2 tsp. baking soda
1/2 tsp. sea salt
1 cup frozen organic blueberries
Preheat oven to 350F. Line muffin tins with paper liners or spray/butter the tins.
In a large bowl, whisk together the flours, cinnamon, and nutmeg.
In a separate bowl, whisk together the eggs, brown sugar, and vanilla. Stir in the zucchini. Add the oil, soda, and salt, and stir to combine.
Add to the wet ingredients to the dry, and stir until just combined, and all the flour is moistened. Gently stir in the blueberries.
Scoop the batter into prepared muffin tins and bake for 15-20 minutes (about 19 for regular muffins, 15 for minis). The muffins should be firm to the touch, and a pick inserted in the center should come out clean. Cool in the pans for 5 minutes, then remove to a wire rack to cool completely.
Note: Mama advises grating your zucchini first and putting it in a collander set over a bowl while you gather the rest of your ingredients. And she says these muffins freeze really well!
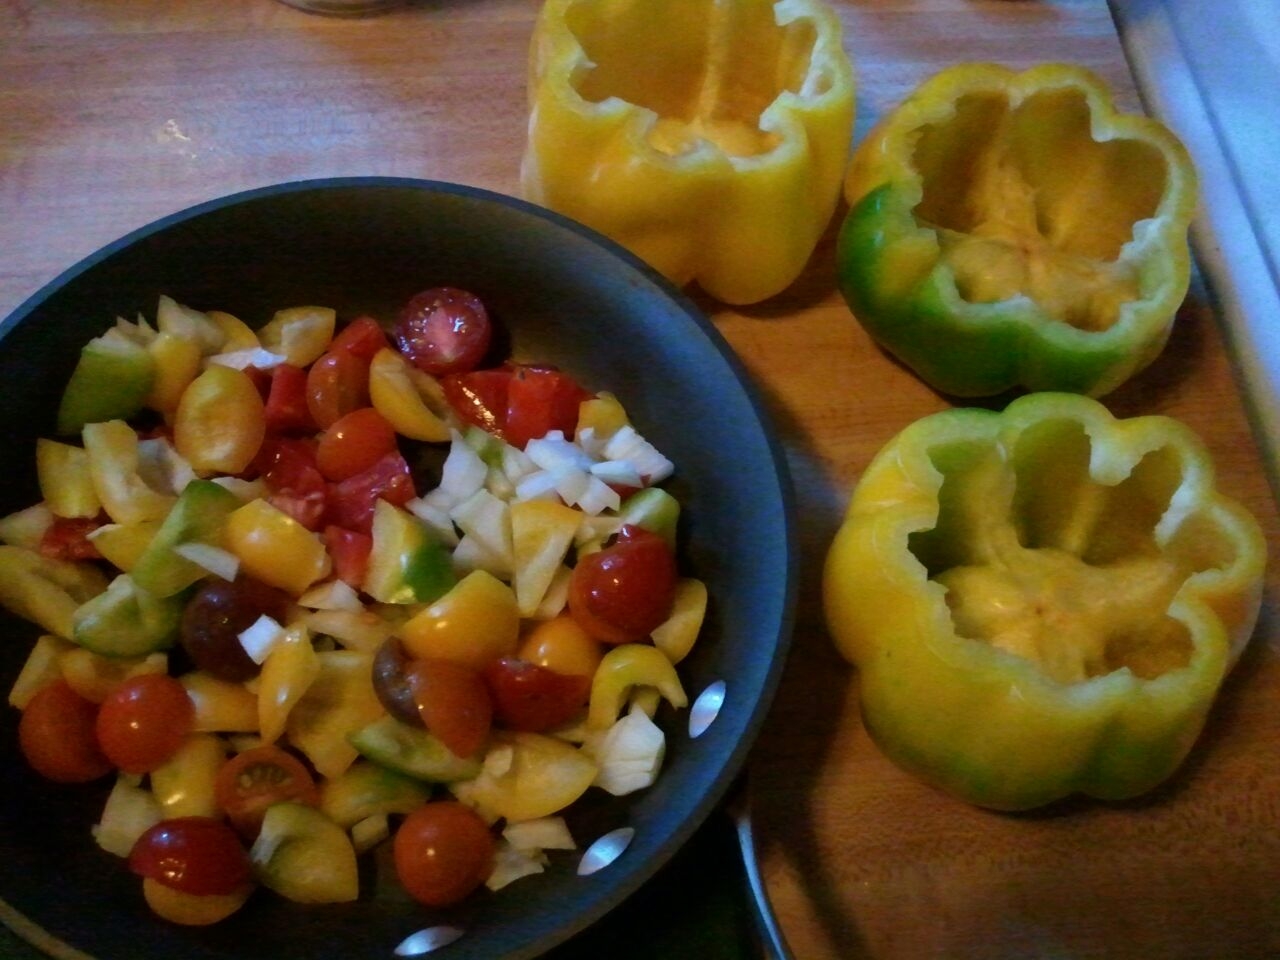
In an effort to fill a Sunday, Mama and I traipsed around to different farm stands (with a stop at the zoo somewhere in between). Next to the zucchini that was almost as big as me, she spied some gorgeous giant yellow peppers and thought they would make good stuffers. At a later stand, she bought a couple ears of sweet corn (this is important, so pay attention).
Much like our ham-and-pea roll-ups, these peppers were stuffed with things we already had in the house. Mama says you can cram practically anything into them. She cut around the top of the pepper and pulled out the seedy core. Then she broke off the pieces of the pepper top and chopped it so she could add it to the pepper stuffing mix. We still had some tiny heirloom tomatoes from my friend Walter, and we had an already-cut onion in the fridge. She put these veggies into a small frying pan with olive oil, cumin, coriander, and salt & pepper and sautéed them until the pepper and onion were soft and the tomatoes were cooked down. She added the kernels from an ear of corn and some crumbled veggie meatballs she had made a few weeks ago and had in the freezer.
How can these not be good?
She stuffed a pepper for me, then added to the rest of the stuffing some adobo sauce from a can of chipotle peppers that were also leftover in the freezer. Mama tented foil over the peppers and baked them in a 375°F oven until they softened, 20–30 minutes. She took the foil off towards the end of cooking, to brown the tops of the peppers.
You can see the added corn & broken up “meat”balls added to the filling.
Meanwhile, Mama cooked some brown rice, but she could very well have used quinoa or couscous. You can certainly add this to the pepper stuffing, but she kept it on the side and added it to the peppers before we ate them. She also made a fast guacamole and baked some tortilla chips by breaking up a whole-wheat wrap, spraying the pieces with cooking spray, and putting them in the oven for 10 minutes while the peppers cooked. (You can season these with salt & cumin, but Mama left them plain.)
Though I’m generally a fan of avocados, I wasn’t too keen on the guacamole. I did dip my chips in it (just barely), though. And to everyone’s surprise, I ate more than a few bites of the pepper stuffing. I had to examine each bite first to figure out what was on my fork, and I wasn’t much in the mood to eat (having missed my nap), but eat it I did. Mama and Papa kept asking, “Isn’t it silly that there’s a pepper for a bowl?” I’ll tell you what’s silly: they ate their bowls. Now, isn’t that silly?
In a medium skillet over medium heat, heat 1 teaspoon olive oil. Add the beef and cook, stirring occasionally, until just barely cooked through, about 6 minutes. (If using frozen soy crumbles, cook until heated through.)
Meanwhile, carefully cut around the top of each pepper, right below the “shoulder,” then pull out the seedy core. (Save the tops.) Pull out any remaining ribs and seeds. Set cored peppers aside. Break off the pepper tops from the stems, and roughly chop.
To the skillet, add the remaining tablespoon olive oil, if necessary. Add the chopped pepper tops, onion, tomatoes, cumin, coriander, and salt and pepper to taste. Cook, stirring occasionally, until the pepper and onion are soft and the tomatoes have cooked down, about 8 minutes.
Add the corn and the chipotle pepper, if using, with as much adobo sauce as clings to it. Stir to heat through.
Divide the mixture among the peppers, setting them in a baking dish just big enough to hold them, such as a pie plate or 8 x 8” pan. Loosely tent the peppers with aluminum foil, then bake for 20 minutes. Remove the foil, then bake another 10 minutes, or until the peppers are softened and the tops are browned.
Papa announced that he had a hankering for pad thai. Now, normally he and Mama would just order in Chinese, but for some reason, they decided to make it themselves.
If there were a signature dish to Thailand, this would be it. There are oodles of variations on it, but your basic components include rice noodles, tofu and/or shrimp, cooked egg, fish sauce, chilies, garlic, bean sprouts, cilantro, lime, and crushed peanuts—all done in the same wok. Often there’s carrot, scallion, basil, and tamarind in some form, as well.
Mama said I could be in charge of the noodles, but as they required being steeped in boiling water, she thought better of it, so off I went to play with my trains. Papa was in charge of chopping, while Mama made the sauce and got everything ready to go. When you stir-fry, you’re cooking over very high heat, so it goes quickly. If you start cooking, then stop to chop your garlic or mince your chilies, what’s in the wok will probably already be burned before you’re done. So get your mise en place together.
The first step is to cook your egg, as a kind of tiny, very flat omelet. First you lightly beat your egg, then when it hits the hot oil in the pan, you continue to beat it for about a minute before it starts to set. Once it’s cooked, remove it from the pan, slice it into thin strips, then add more oil to the wok. From there, you start to quickly cook your protein (cut into small pieces if it’s not tofu or shrimp); then remove it from the pan and then add your veggies. Follow with your sauce and your noodles, mixing it all up. Add back the egg and protein, and keep mixing everything. You want your noodles to absorb the yummy sauce and begin to fry a little bit. Then top with crushed peanuts and raw sprouts. Serve with wedges of lime.
You don’t have to use a wok, but the deep sides of the pan sure help to keep all the noodly goodness in one place.
Mama had the back of her mind on alternate dinners for me, so sure she was that I wouldn’t eat the pad thai. But since she opted to go without the chilies, there was nothing about this I didn’t like. Those springy noodles were great, and I really liked the egg! The crunch of peanut was nice, too. But you know… I felt it needed more lime. So I said so. “I need lime.” And the reward for my fledgling sentence was more lime. Mama also served a cucumber-soy-ginger salad on the side. I had one salty bite, but I preferred the pad thai. What can I say? I’m a simple guy.
Next to tastiness, these noodles were just plain fun to eat.
The other day, Mama took me blueberry picking. By now you realize that she keeps a pretty close eye on what I eat, and I think you know she tries to purchase foods that are local and organic—when they make sense. Blueberries are consistently among the Environmental Working Group’s “dirty dozen” of fruits and veggies with the most pesticides, but because Mama doesn’t always want to pay $6 for a pint of organic berries, we often skip them. For this reason, she was overjoyed to find the organic fruit farm just a short drive from our house. And it turned out to be a fun afternoon activity with yours truly.
I enjoyed picking the bluebies…
I couldn’t believe how little the bushes were! I walked right up to them, bucket in hand, and just started picking (and eating). It was like when we picked the wild raspberries: from the bush and into my mouth.
…almost as much as I enjoyed eating them.
The berries were warm from the sun. Mama reminded me, often, to pick just the blue ones—not the purple ones, and not the green ones. We saw all kinds of big caterpillars on the leaves. The farmer, when he came over to snack from a bush, told us they sure love blueberries. Much like Sal in that famed story, I did wander off from time to time, and Mama had to chase me up and down the rows. But we managed to fill her bucket (for some reason, mine remained empty), and I played with the two farm dogs roaming the property. We picked nearly 5 pounds (but they didn’t weigh me!), all for $12.
Er, this is my bucket. That’s Mama’s in the background.
When we got home, Mama spent a lot of time washing the berries and fending me off from eating them by the handfuls. They had a lot of grass clippings—and bugs!—on them. I helped her de-stem them, too. (That’s a very good task to give someone my age…until said someone starts snacking on them, stems and all.) Because most of our haul was intended for the freezer, Mama spread the berries on a towel-lined cookie sheet so they could dry. (This is why you can buy frozen berries that are separate and perfect, rather than in clumps—they’re individually quick frozen.) You spread them out on a sheet, make sure they’re relatively dry, then pop the sheet in the freezer. Once frozen, you can put them in storage bags or containers. We got 3 sheets of bluebies.
This is how you dry the washed bluebies before freezing them.
As they were drying, Mama asked what we should make, and I agreed that muffins sounded good. I’ve never made a recipe quite like this one before. Mama melted the butter in a saucepan and added the other wet ingredients to it before adding them to the dry. Weird, huh? Usually, you’d use oil in a two-stage recipe, she told me, but we like butter! It’s been a while since I’ve baked anything, and Mama was impressed with how far I’ve come. I poured all the dry ingredients into the bowl without spilling—the mess came later when I whisked it like a dervish.
You can’t see it here, but my belly is COVERED in flour!
Once everything was combined, I added the bluebies to the batter, then helped Mama fold them in. She explained that if we stirred them too vigorously, they would crush and stain the batter blue. Not that it would affect the taste any, but we wouldn’t have those lovely whole berries to sink our teeth into later on.
This was my last chance to eat bluebies before they were mixed in.
She showed me how quickly you can make a crumb topping, and I helped sprinkle it on top of each muffin. Into the oven they went, and off I went to play. I was experiencing some sort of natural berry high and had a lot of energy.
Check me out!
But not too much to keep Mama from giving me half a muffin once it cooled a bit. (She thinks I didn’t notice she ate the other half.)
YOU try eating just half of one.
Regardless, there were so many bluebies in it! The muffin itself wasn’t very sweet, but the bluebies made up for that. And they were good and crumbly in my hand.
After a long day of picking the bluebies and washing the bluebies and making the bluebie muffins, I finally get to eat one!
Mama said she wants to go picking again next weekend to stock up for the winter. I hope we do!
Love, Jude
Bursting Bluebie Muffins with Crumb Topping
6 Tbsp unsalted butter (or canola oil, then skip the saucepan direction)
1/3 cup buttermilk (or milk)
2 eggs (or 4–5 Tbsp unsweetened applesauce)
1 tsp vanilla extract
1 cup whole-wheat flour
1/2 cup all-purpose flour (or 1 1/2 cups all-purpose total)
1/2 cup sugar (or brown)
1 1/2 tsp baking powder
3/4 tsp salt
1 1/2 cup blueberries
For topping:
handful of whole-wheat flour
spoonful of brown sugar
spoonful of finely chopped walnuts (optional)
a few pats of butter
Preheat the oven to 375°F. Butter or spray 12 muffin cups (or use paper liners, if that’s your thing). Melt the butter over low heat, then whisk in the milk, eggs, and vanilla. In a separate bowl, combine the dry ingredients (minus the blueberries), whisking to incorporate. Add the wet to the dry, stir until just combined, then gently fold in the blueberries. Top with the topping ingredients, mashed to combine. Bake for 17-20 minutes, until a wooden pick inserted in the center of one muffin comes out clean. Cool in the pan for 5 minutes, then, if you didn’t use papers, run a knife around the edges to loosen. Transfer to a rack to cool or eat!
Mama had a mess of heirloom tomatoes ripening on the counter and more kale in the fridge than she knew what to do with. Even I can’t eat that many kale chips. So she decided to make a tomato tart with kale pesto.
You can use beefsteaks or romas…but why would you want to?
The first thing she did was lop off the top of a head of garlic. She laid it in foil, drizzled it with olive oil, scrunched it all up, then put it in the oven for about half an hour. Just until the garlic softened and started becoming golden. She told me this is a really yummy thing to spread over crostini, which she said I’ve actually eaten before, but my baby memory isn’t recalling that.
A drizzle of oil transforms garlic into something YUM.
Meanwhile, Mama made the crust. She explained to me that she doesn’t generally like making crust in the food processor because then she has to clean the darn thing, but since she would be making pesto with it anyway, she figured why not? To the processor, she added her flour, oats, and salt. Then she added her butter and processed it just until little clumps formed.
This is how you want your butter cut in to the flour, whether it’s by hand or machine.
She said you don’t want to process the butter so much that it melts–the cold butter is what makes for a flakey crust. Then she added the ice-cold water and processed it again just until large clumps formed and began pulling from the side. She tested the dough by squeezing a bit in her hand, and she saw that it held together. You don’t want to process it into a smooth ball, otherwise you’ve overdeveloped something called gluten, and your crust will be tough.
This is how you your dough should look when it’s ready. See the squished clump in the top left?
Once she had the crust chilling in the fridge, Mama moved on to the pesto. Ordinarily, Mama makes a pretty traditional pesto, which she first ate, ironically enough, at a friend’s mother’s house in Bad Bramstedt, Germany, back in the ’90s. When you use basil or other fresh green like arugula, you can make the pesto fresh from the garden. When you use something hardier, like kale, it’s better to first blanch the greens. Mama generously salted her boiling water (and I stayed far away from the burner) and blanched the kale for a minute or two, in batches. She then ran the cooked kale under cold water (she said she’s cheating because she really should be putting it in an ice bath…but there are only so many dishes she wants out of the cupboards at any given time). The kale went into the food processor, to which she added olive oil, more salt, pepper, fresh lemon juice, toasted pine nuts (you don’t have to toast them–they just develop a nicer flavor), some freshly grated Parmesan cheese, and the roasted garlic. When the cloves were cool enough to handle, a gentle squeeze popped them right out of their papery skins! She whirred the ingredients in the processor and stopped to taste. I reached in and grabbed a chunk of the pesto to try for myself. I was not happy with it. But neither was Mama! She added more lemon and more salt.
A tart is so pretty and sophisticated (like myself), but Mama had so many tomatoes that she decided to turn this into a deep-dish pie. I sampled many of the tomatoes to be sure of their ripeness, which is rather strange considering that I rarely eat raw tomatoes.
If I see something sitting on the counter, I’m going to eat it!
Then Mama rolled out the dough. I took my bitten tomatoes and stamped them on the dough to make pretty patterns. She showed me how to wrap the dough around the rolling pin to lay it into the pie pan easier. There was really a lot of dough, so Mama trimmed the edges and was sure to have leftovers. Then she spread some pesto along the bottom of the pie. She neatly layered some sliced tomatoes, then sprinkled some mozzarella on top.
I like the pretty colors of the heirloom tomatoes.
She explained that if this were a shallow tart, she’d be done, but she continued with two more layers in the same manner. (The leftover pesto she put in the fridge for pasta, but it would also freeze fine.) She put the whole thing in the oven until the top was brown, about 30 minutes, then grated some asiago cheese on top. She could’ve put it back in the oven for another minute or so, but she didn’t.
I had a few bites, which tricksy Mama was trading off for bites of the crust, which I really enjoyed. She kept telling me that if it were horrible she wouldn’t be bartering, but I’m not so sure. I hear this pie tastes good cold, too. Guess I’ll find out for lunch tomorrow.
Love, Jude
Heirloom Tomato & Kale–Roasted Garlic Pesto Tart
Roasted Garlic
1 head garlic
1 Tbsp extra-virgin olive oil
Pastry Crust (or, Pâte Brisée if you’re really interested)
2 1/2 cups all-purpose flour (you can substitute whole-wheat, if you like)
1/3–1/2 cup ground rolled oats (optional)
1 tsp sea salt
2 sticks cold unsalted butter, cubed
1/3 cup ice water
Pesto
1 large bunch kale, ribs removed and torn into rough pieces
Extra-virgin olive oil (about 2 swirls around the food processor)
Juice of a lemon (or more, to taste)
Kosher salt (to taste)
Freshly ground black pepper (a few grinds)
2 Tbsp toasted pine nuts (toasting optional)
3 Tbsp freshly grated Parmesan cheese
Tart
1–2 pounds ripe heirloom tomatoes (however many you need, depending on size & variety)
1–1½ cups shredded mozzarella
Freshly grated asiago cheese
To roast the garlic: Preheat the oven to 350°F. Trim the tops off the garlic bulb, place it (cut side up) in the center of a square of foil, drizzle with the olive oil, seal the top of the foil, then place the bundle in the center of the oven. Roast until the garlic is soft and fragrant, and slightly brown, about 30 minutes. (You can certainly make the pesto with regular ol’ garlic, too, without the roasting.)
For the pastry crust: Combine the dry ingredients in a food processor. (Mama already had ground oats, but if you don’t have them, grind them in the processor first.) Give it a few pulses to distribute. Add the butter and pulse about 10 times, just until the butter and flour begins to form pea-sized lumps throughout. With the machine running, add the water in a stream and process just until the dough starts to clump. Turn it out onto your counter, give it a few quick kneads to bring it all together, flatten it into a disk, and wrap it in plastic. Refrigerate for half an hour.
For the pesto: To blanch the kale, bring a large pot of salted water to a boil. Working in batches, if necessary, add the kale to the water and stir to submerge. Boil for 1–2 minutes, until the kale is bright green. Transfer with a slotted spoon or tongs to a bowl of ice water (or to a colander that you’ll then run under cold water in the sink). If using toasted pine nuts, toast them in a dry pan over medium heat for a few minutes, shaking every so often, just until fragrant. You can also put them on a piece of foil or on a baking sheet and stick them in the oven, since it’s on. As soon as you smell them, they’re done! Place all the ingredients in a food processor and blend until pasty. You might need to add a little more oil—you can even add some of the blanching water. Taste and adjust seasonings. (Mama notes that all these amounts are approximate.)
To finish the tart: Slice the tomatoes—about as thick as you would a sandwich tomato. Set aside. Take the pastry crust out of the fridge and remove the wrap. Generously flour a surface, then gently roll the dough. Lay into pie or tart pan, then trim the edges, fluting if desired. Spread a layer of pesto along the bottom. Arrange slices of tomato to cover, then sprinkle with mozzarella. Repeat layers, if desired, ending with cheese. Bake until golden, about 30 minutes. Shave additional cheese on top, then pop back in the oven until melted and browned, a few minutes more.
…to “Kale Chip.” You might recall that last summer my cousins began calling me “Kale Puff,” in reference to my snack of choice (in lieu of sugary, o-shaped, or fake-cheese snacks). While I’ve been a bit turned off to green foods of late, I feel the need to come clean on something. This morning, I climbed up onto the counter (I have been getting taller and stronger!), took down the container of freshly made kale chips, and proceeded to eat them. For breakfast. Go past “moo-moo milk” and yogurt, and head directly to greens.
I’m holding a chip in one hand, eating one with the other, and getting ready to feed my fleet of trucks.
I can’t explain it. Perhaps it’s their slight crunch. Perhaps it’s their saltiness (Mama can be a bit heavy handed with the stuff). Perhaps it’s because I can munch and munch until I stuff a pretty big leaf in my mouth. Perhaps it’s because these chips were made with kale from my friend Walter’s organic farm. (In fact, he helps his mama harvest the kale; she tells us it just keeps growing and growing.) Or maybe I just really like kale. There are worse things for a kid to like, you know.
Love, Jude
Supereasy Kale Chips
1 bunch of kale, torn from the ribs into manageable pieces
Olive oil spray (not the kind that comes in an aerosol can)
Sea or kosher salt
There are tons of places you can look to find a recipe that suits you, but this just happens to be how Mama made the chips last night. Preheat your oven to 300°F. Lay a sheet of foil, if desired, onto a baking sheet and spread out the torn kale. It’s okay if the pieces overlap—they’ll still dry out. Spray the leaves with the olive oil, then sprinkle liberally with the salt. Bake, checking on them periodically, until crispy, about 10–15 minutes. Store in an airtight container at room temperature until gone.
Note: Mama said to tear your kale into uniform pieces, as bigger pieces won’t dry out as much as smaller pieces. I should also point out that I didn’t like the pieces with even the small veins in them—I kept chewing and chewing, and eventually I had to spit out a little kale blob. If that sounds gross to you, think of how Mama felt when I put it in her hand!
You might recall that I used to eat a lot of spinach, in the form of something we called “gruel.” But now that I’m beyond all that baby food, Mama serves me sautéed spinach and kale, and I notice she puts herbs in everything. I am no longer such a fan.
Mama had some leftover halibut from fish tacos, so she decided fish cakes would make for a good dinner. Papa peeled and boiled the potatoes, and Mama raided the garden for the mint and parsley. The cakes came together pretty quickly, so Mama decided on her favorite chickpea salad as an accompaniment.
While Mama’s a proponent of cooking beans, she feels this is only something a person who has her act together can do, and Mama is not one of those people. She doesn’t have various pots of beans and grains cooking and all her vegetables cut for the week ahead on a Sunday. She just doesn’t. So when it comes to a superfast side dish (or sometimes, in Mama’s case, a main dish), she likes being able to reach into her cupboard and pull out a can of beans. Just drain, rinse, and serve. Now, I’ve been slow to come to chickpeas (though I like to say “chick-pea”), but I very recently ate half a can all on my own. So Mama felt pretty confident I’d share her gusto for garbanzo salad.
Not so much. I couldn’t find one that was just a plain old chickpea. All that basil and parsley. Doesn’t she get that toddlers have a clinical aversion to green showing up on non-green foods? As for the fish cakes, I took my obligatory one bite, but that was enough for me. I liked the crispy fried part okay, but it still tasted fishy—and there was all that greenery. I ended up sharing it with the dog. The green I didn’t mind was the avocado I ended up eating for dinner.
Love, Jude
Herbed Chickpea Salad
1 can chickpeas, drained & rinsed
Handful of fresh parsley, minced
Handful of fresh basil, minced
1–2 cloves garlic, minced
Juice of ½ lemon (or more, to taste)
Kosher salt & freshly ground black pepper
Drizzle of olive oil
Freshly grated Parmesan cheese
As you can see, this is a pretty loose recipe. Mama just does it all to taste. Start with a little of an ingredient and add more. Remember, you can always add more, but you can’t take it away!
When I was in Italy, I had something I’d never eaten before: gelato. Mama and I had it every day (I think she had it twice a couple times, too, which she thinks I don’t know about). We ate gelato with pears and Nutella, gelato with basil and cantaloupe, gelato in cones, gelato in cups… I can’t even tell you all the kinds of gelato we had!
Look how well I can hold a cone of gelati.
But now that we’re home, and it’s awfully hot outside, Mama’s kept it simple and made me popsicles. They’re so easy, even I could do it…but then again, I’m pretty handy in the kitchen. The only part I needed help with was making the simple syrup (hot!) and cutting the honeydew (knife!). After that, we pureed it in the blender, Mama poured the mixture into the popsicle molds, and then she put them in the freezer. Waiting until they were frozen would have been the toughest part, if I hadn’t had to go to bed.
What I like about these popsicles is that I can bite them. They’re just a little bit crystally and not too hard. They’re sweet, but they mostly taste like the green melon. And I see that Mama snuck a little raspberry into each one that I have to munch may way down to. I also like that I can hold it by myself, which just means that I can offer it up to Mama (or Papa) for a taste. Just a taste, Mama.
See the raspberry Mama hid in my popsicle?
Love, Jude
Fruit Popsicles
½ cup sugar
½ cup water
Fresh fruit (about 3 cups), cleaned & prepped
Bring the sugar and water to a simmer in a small saucepan, stirring occasionally, until the sugar dissolves. Set aside and cool completely. (This is called simple syrup. You can adjust the sweetness as you prefer, but Mama likes the one-to-one ratio here. This makes a little under 1 cup.)
If you’re using a large fruit, like a honeydew or cantaloupe, peel, seed, and chop it into cubes. Smaller fruit, like berries, can be tossed in whole after being destemmed. If you’re using something like peaches, it’s really up to you if you want to peel them. Put the fruit into the blender and add the simple syrup. Puree until there are no more chunks of fruit, a minute or two. Again, if you want your popsicles less sweet, start with half the syrup, puree, then taste it. Mama says you need to have some sugar in it, though, otherwise the popsicles will freeze solid.
Pour the puree into popsicle molds—but don’t fill them all the way. If you want, drop a tiny berry in at the bottom—it looks pretty, and it’s fun to get to! Seal up the pops and freeze until set, a few hours. We got exactly 18 pops from this mixture, and I’m working my way through them.
When Mama was growing up, she told me she had an Italian plum tree and a sour cherry tree in her yard; later, there were apple trees. One by one, though, they began to die, but the plums and “sours” (as she calls them) continue to be among her favorite fruits. It’s probably how she came to pinch the cherries from the tree down the street from her, in the yard of an old woman whose tiny house was all that stood guard over the coveted summer crop.
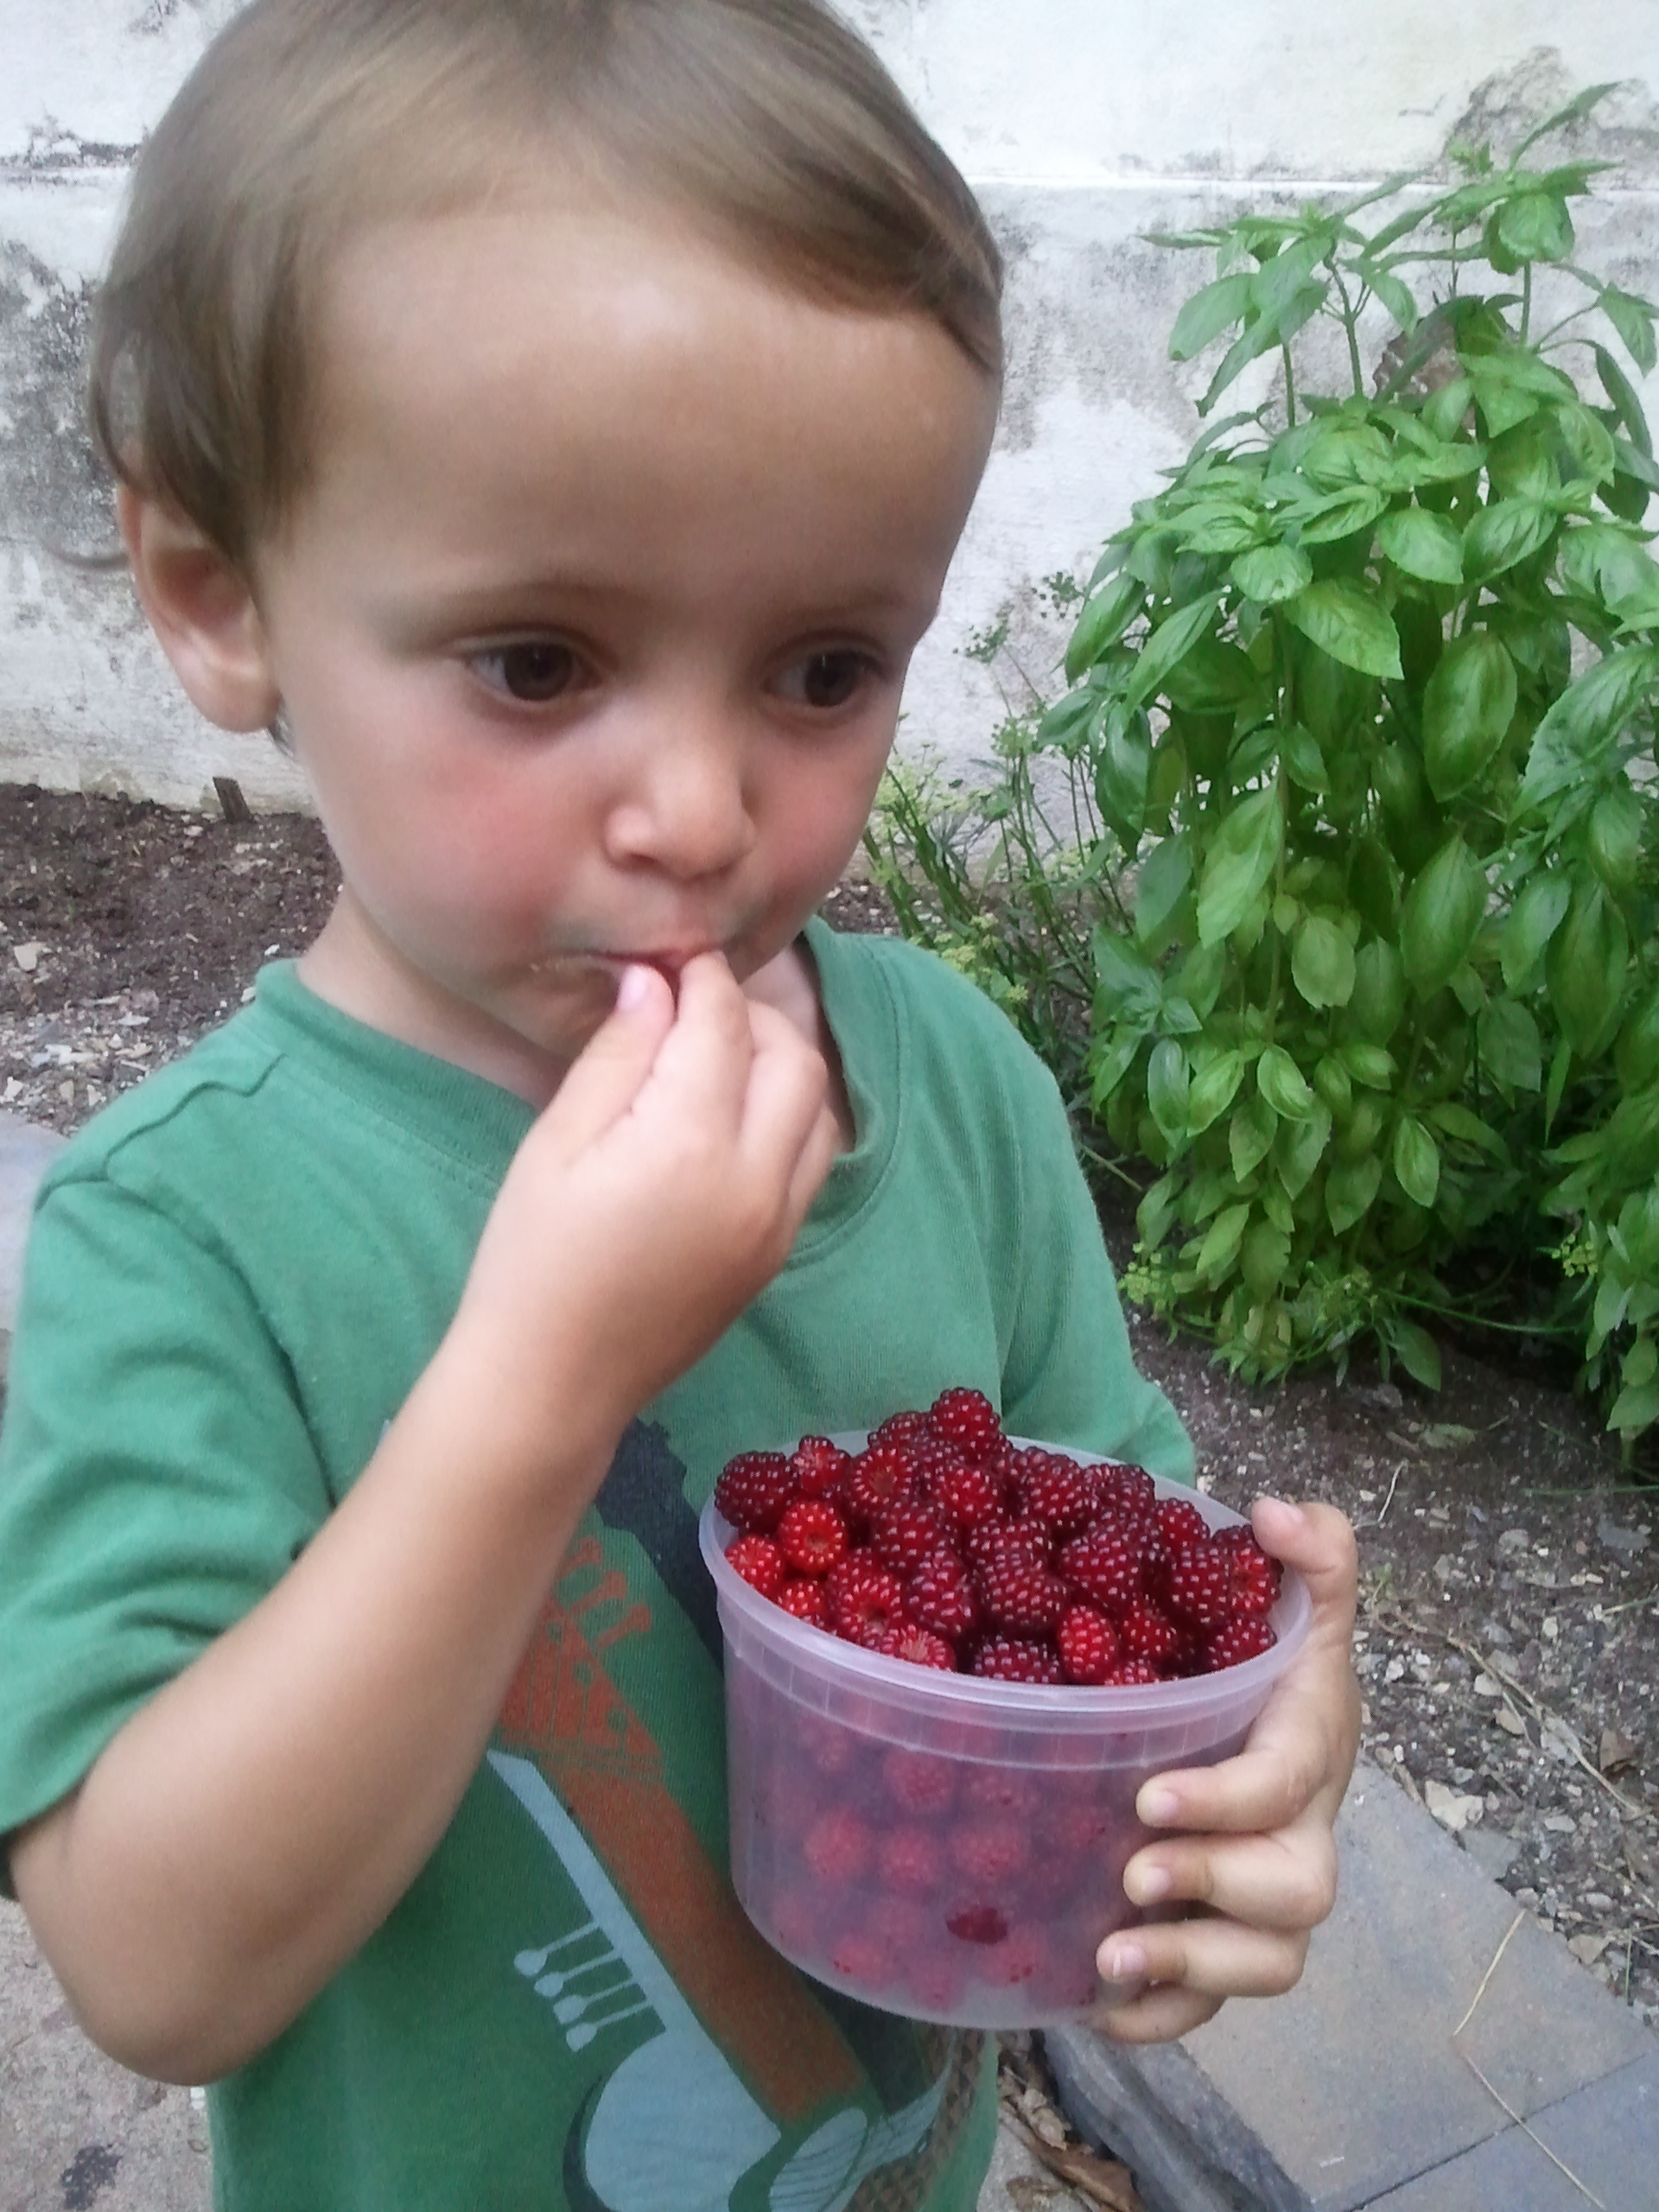
It’s a wonder, then, that it took three summers before Mama noticed the wild raspberry bush in our neighbor’s yard…especially since the house has been vacant since before I was born. When she noticed the red gems glowing in the sunlight, she darted across our semi-private mountain road with me (after looking both ways, of course) and pointed out the very reddest ones, showing me how to pick them and either pop them right into my mouth or put them in a dish. (Sometimes I pick the orange ones and throw them because that’s fun too.) She only let me get the berries closest to the edge of the bush because, as she soon discovered, the vines and leaves were positively covered in thorns of all sizes that made her skin itch.
Mama explained I can only ever pick berries when I’m with her or Papa, and only then, just the berries they say are okay to eat. (Papa later pointed out that she failed to explain that we shouldn’t be picking someone else’s berries without their permission. Mama replied, “Who’s there to ask?”) Luckily, there’s a small vine of berries on our side of the road, in front of the whistlepig’s hole, so maybe next year it will have enough fruit for us.
This is photo was taken a year after the original post. We get about this many berries every other day.
Until then, Mama goes on a raspberry raid almost every day, though she sadly reports that they’re coming to an end. I get to eat them with my yogurt in the morning or as a snack throughout the day. They’re yummy and very sweet. I like that they’re so tiny, and Mama likes that they keep in the fridge for a couple days without spoiling. When she started picking more than we could eat, though, she decided to make a small batch of freezer jam. Because it gets very hot and can splatter, she didn’t let me near the stove when she made it. But I did get to taste the result when she spread it on a homemade flatbread that Papa grilled, then topped with arugula and dollops of ricotta. Wherever the fruit comes from, I could get used to this kind of eating.
Love, Jude
Purloined Wild Raspberry Freezer Jam
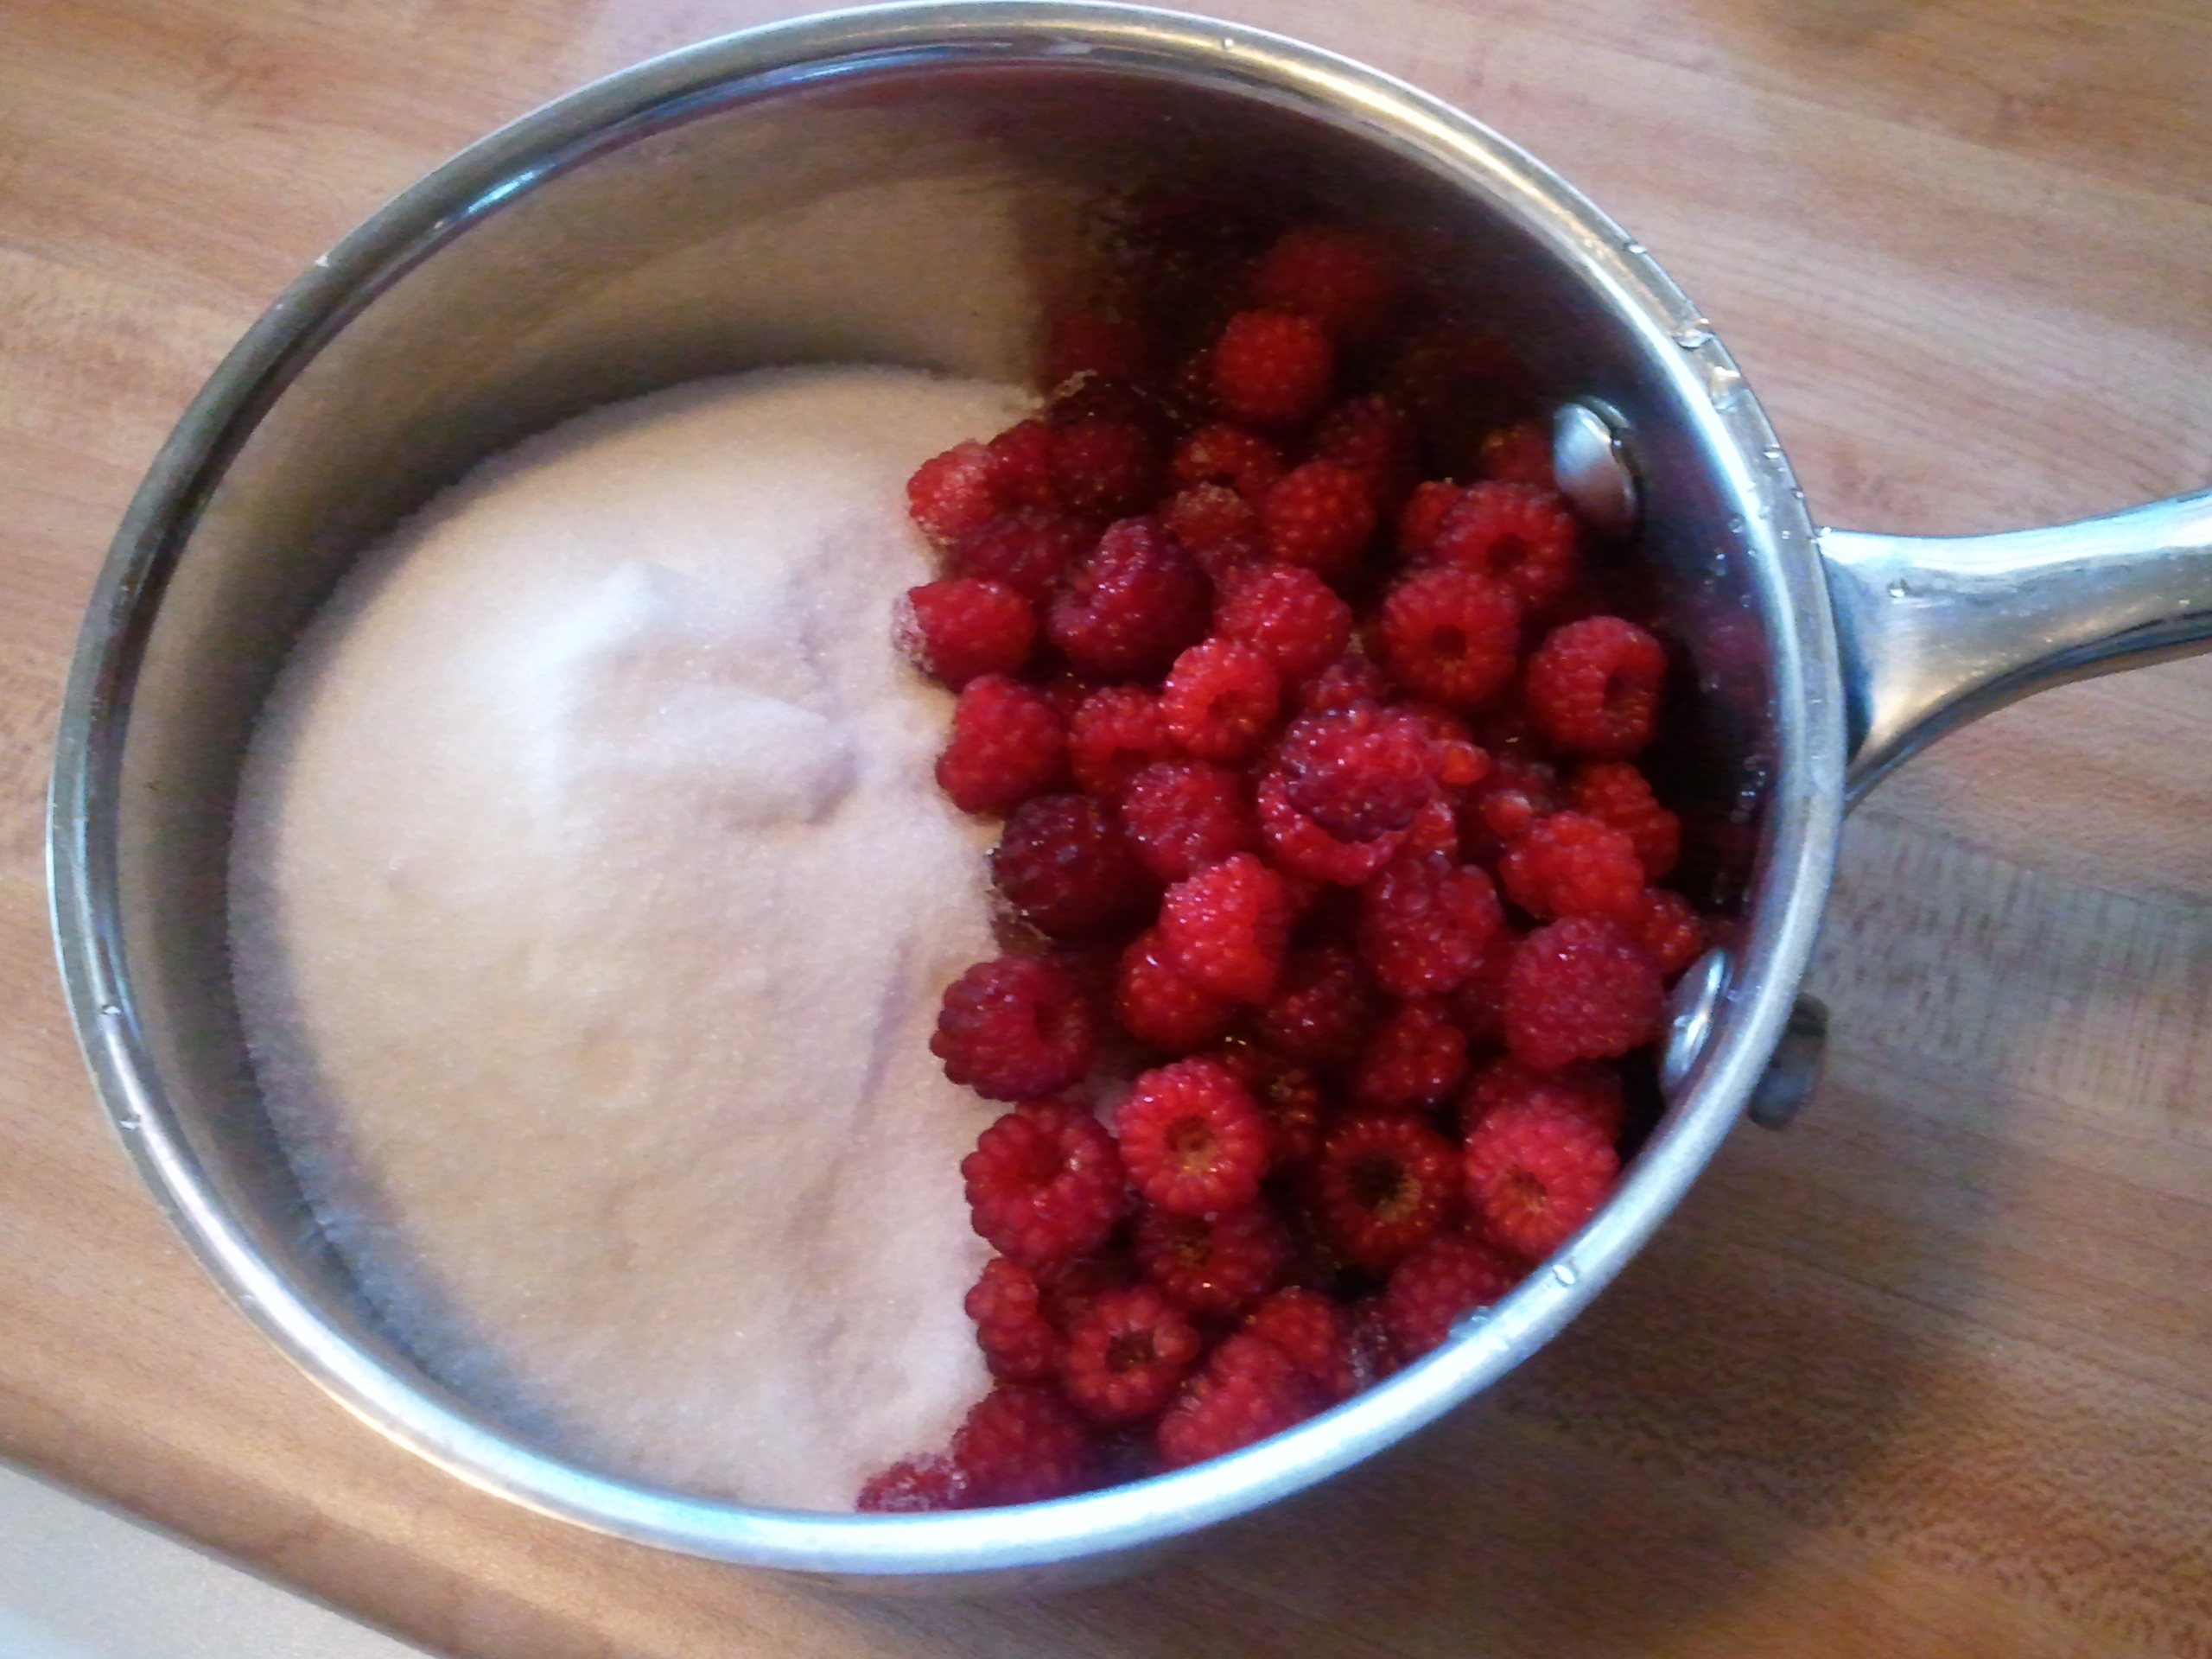
2 cups wild raspberries (or any other berry, or a mixture) 2 cups sugar Juice of half a lemon (or to taste, but you need some acid to make this all work)
Wash and prep your berries (hull and halve strawberries, destem blueberries, etc.). Add them to a small saucepan with the sugar and lemon juice.
Equal parts fruit and sugar… I like this already.
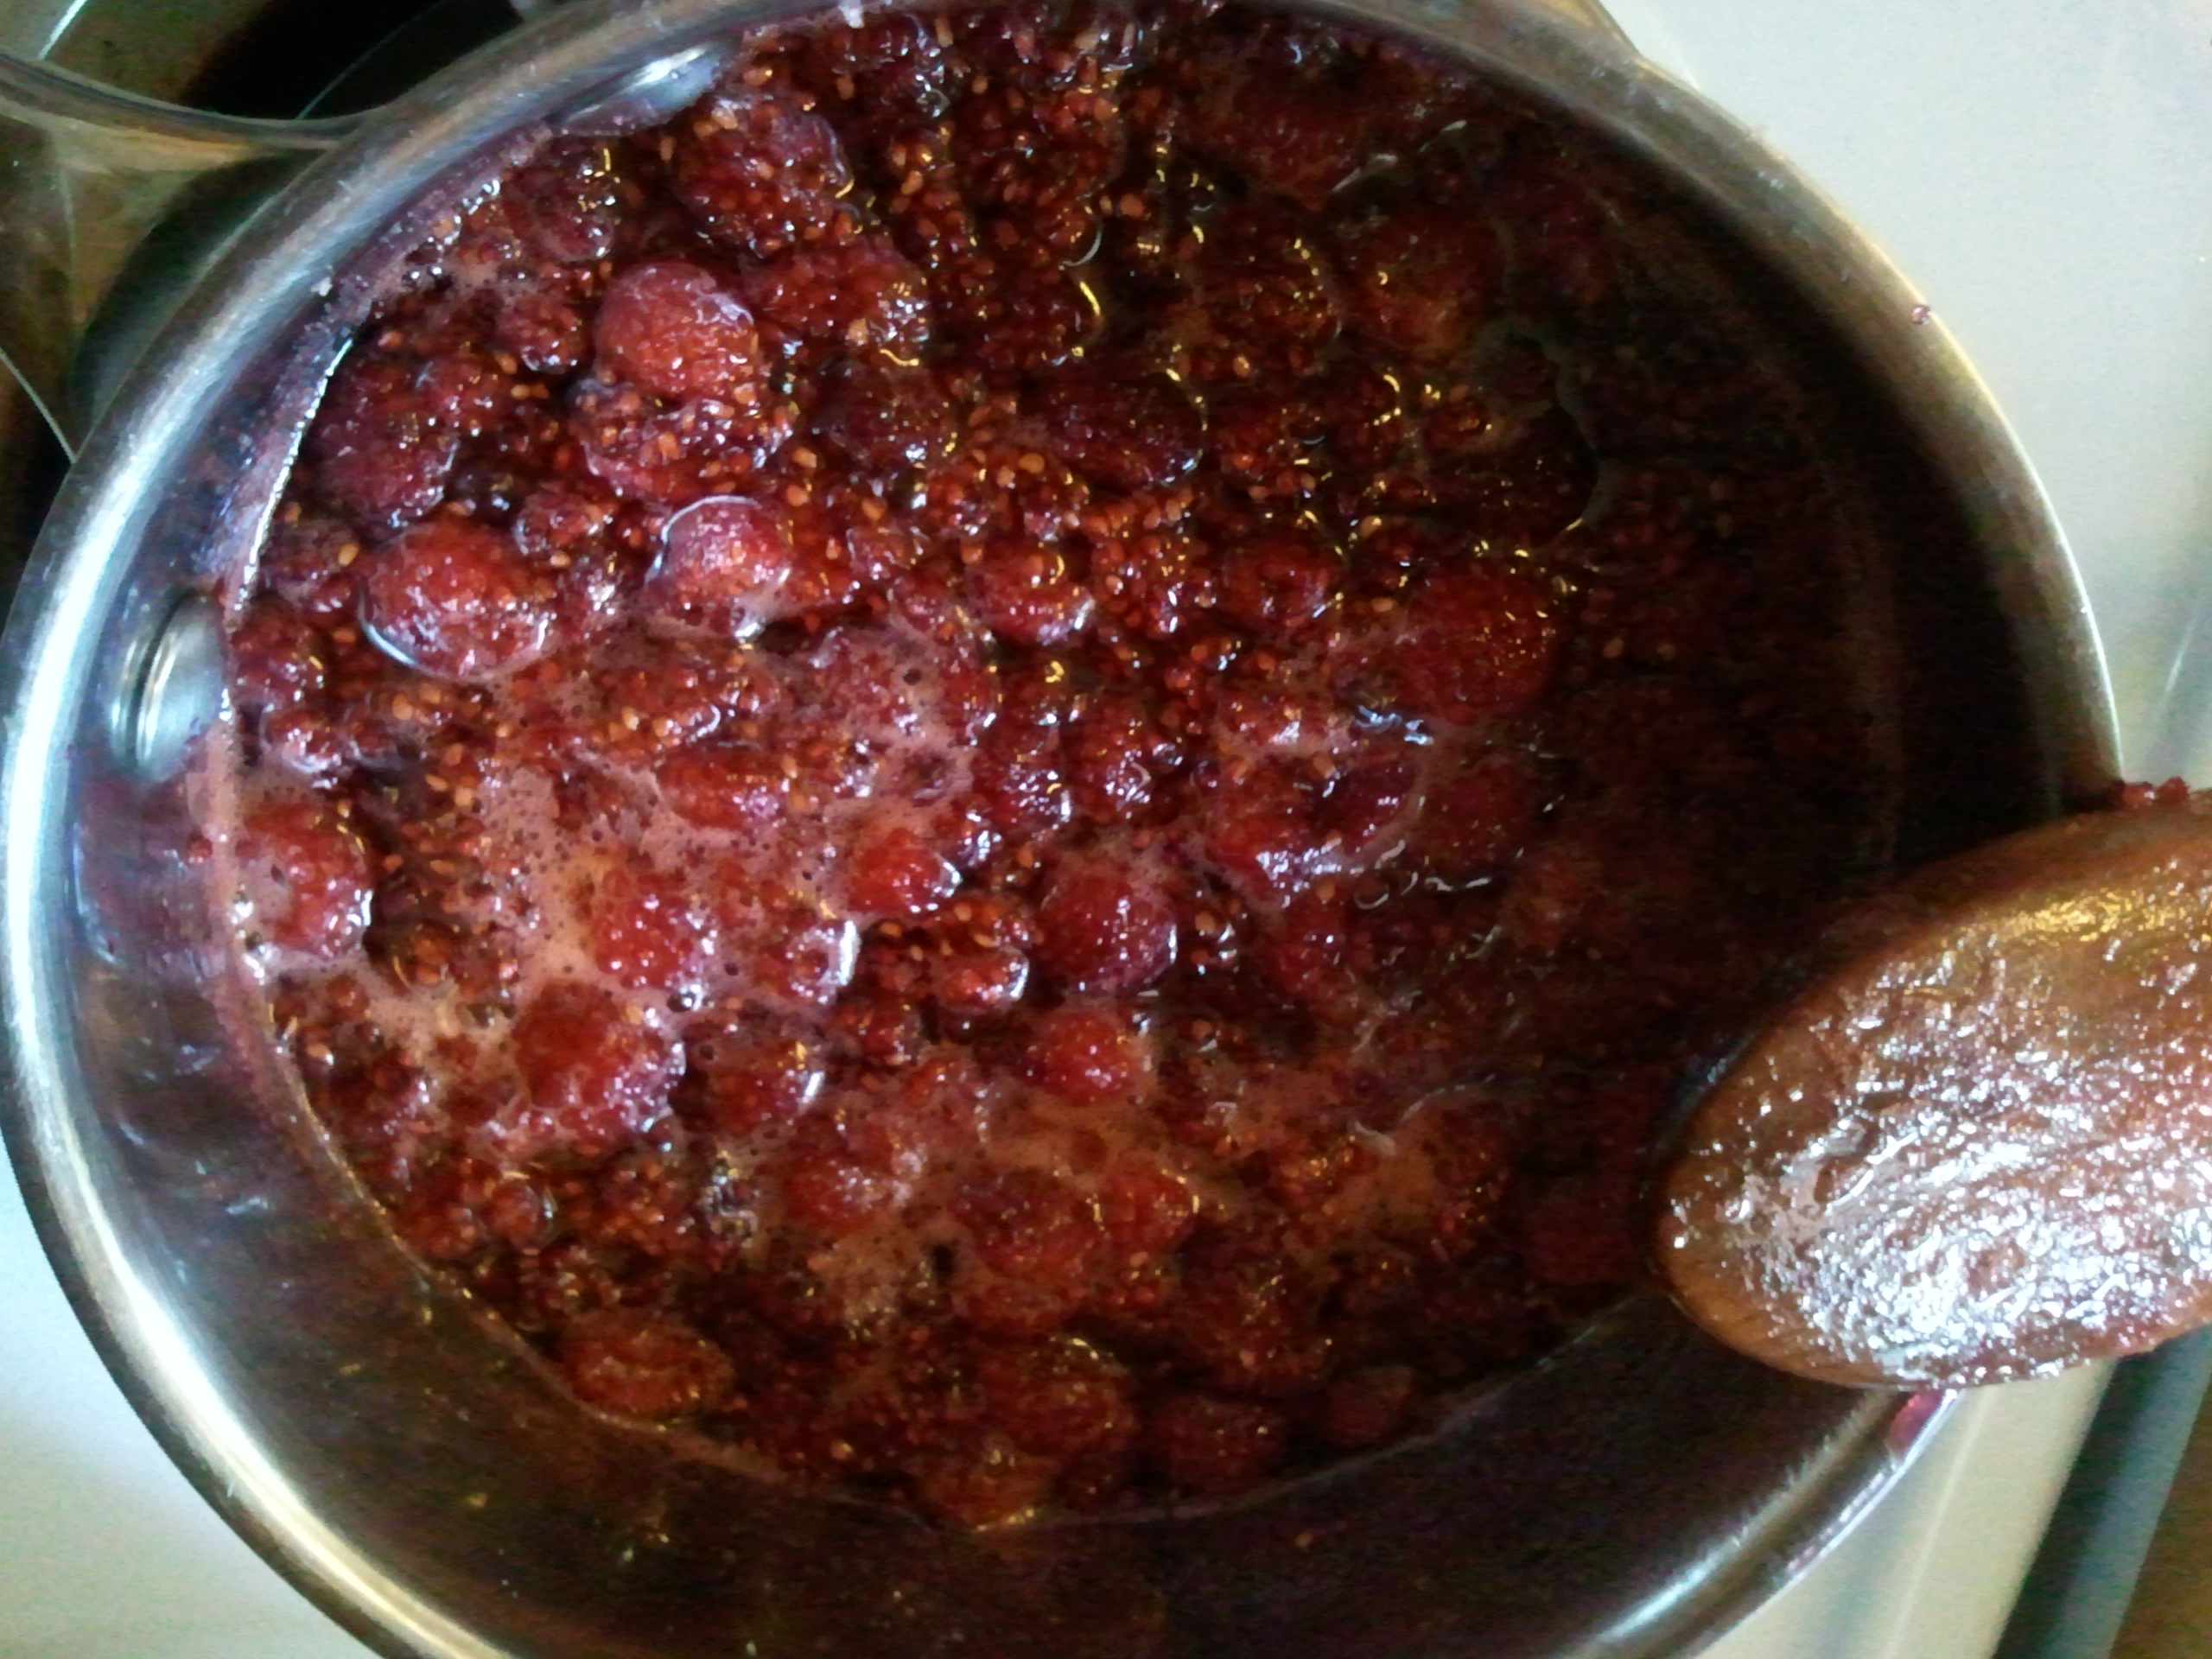
Bring it all to a gentle boil, and lightly smash your fruit. You can leave a few whole chunks, but you need to smoosh the fruit to release its pectin. Boil, stirring frequently, until the jam begins to thicken. This could take about 10 minutes—the riper and sweeter your fruit, the longer it will take.
See how it’s getting all gooey and jammy?
If you think it’s jammy enough, you can test it by spooning a bit onto a plate and sticking it in the freezer. Once it’s cool, you can tell whether it’s ready by tilting the plate—if the jam runs right off, it’s not done; if it sort of goozes the way jam should, then you’ve got yourself jam. Carefully pour the hot jam into very clean jars—this recipe makes less than 1 pint. Mama uses a Ball jar and waits to see if the seal pops shut (a time-honored tradition in my grandma’s kitchen, she tells me). Regardless of whether they seal, Mama waits until the jars are cool to the touch then puts them in the freezer. No special canning equipment or know-how required. Unfrozen, the jam will last in the fridge at least a month, but really, could you wait that long?
Note: Some people use pectin when they make jam. Mama says it’s a natural ingredient in fruit anyway, so she doesn’t add it to hers. Even though it ensures your jam will “gel” every time, she likes the simplicity of measuring sugar and fruit in equal proportions. And her jam is usually thick enough to spread between cake layers. Usually. If you decide to use pectin, she suggests buying the no-sugar-added kind, following the package directions for the amount to use, and decreasing the amount of sugar you use in this recipe. (You’ll still want to add sugar, even with this kind of pectin.) Be sure to boil your jam to activate the pectin—but not too long, or the pectin will start to break down!